


Hi Everyone
I wanted to thank everyone who came and joined in on the blog hop fun last weekend and Karelj for putting on the blog hop. She did an awesome job organizing the whole event.
Ok the winner is #38
Tamara said... 38 Very pretty banner! TFS!
I am emailing you right now.
Wednesday, March 30, 2011

Tuesday, March 29, 2011
Cricut Circle Magazine Challenge- March
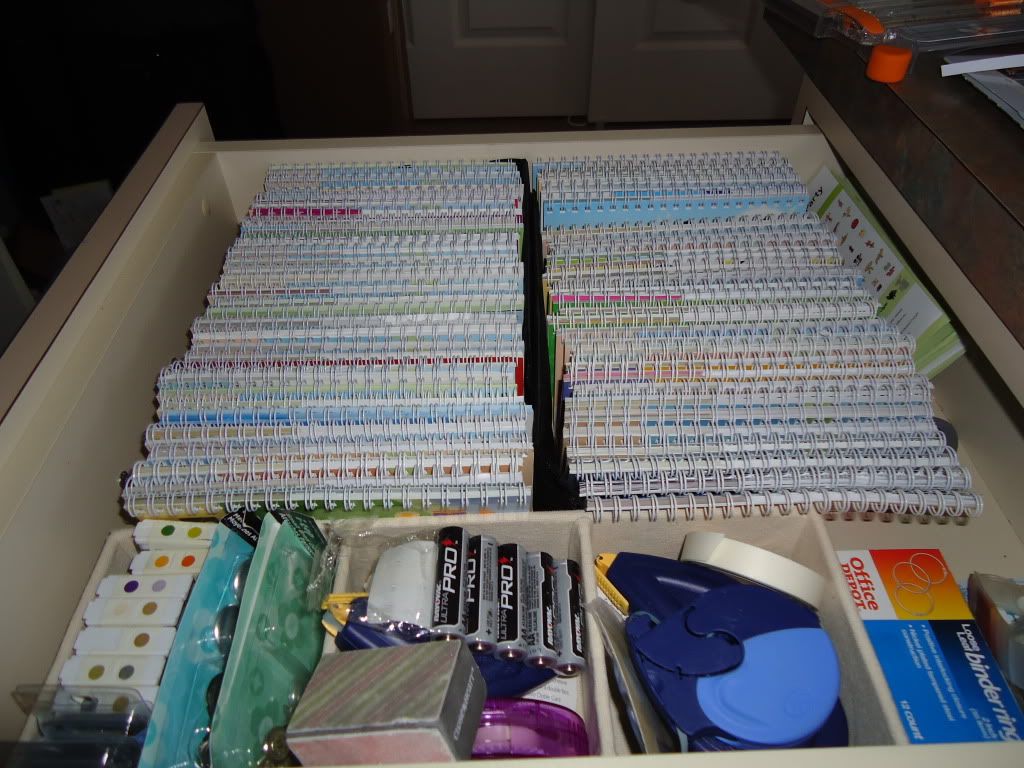
This month the Cricut Circle Magazine challenge was to show how you store 4 of your Cricut items.
First, this is how I store my cricut books. I keep them in the top drawer of my desk because I use them so often I need them close by. I don't keep the boxes or the cartridges with them because I use my Gypsy for everything so I very rarely need the cartridges. I keep them in alphabetical order.
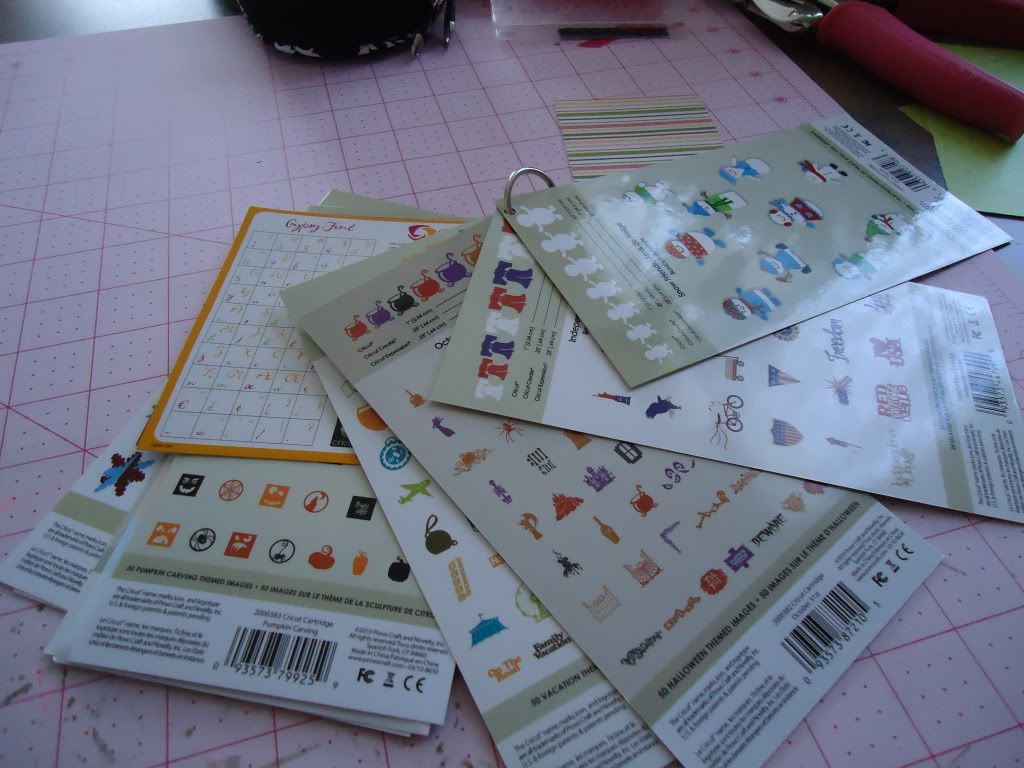
 Next I keep the solutions cartridges on a ring, as they are just one piece of images.
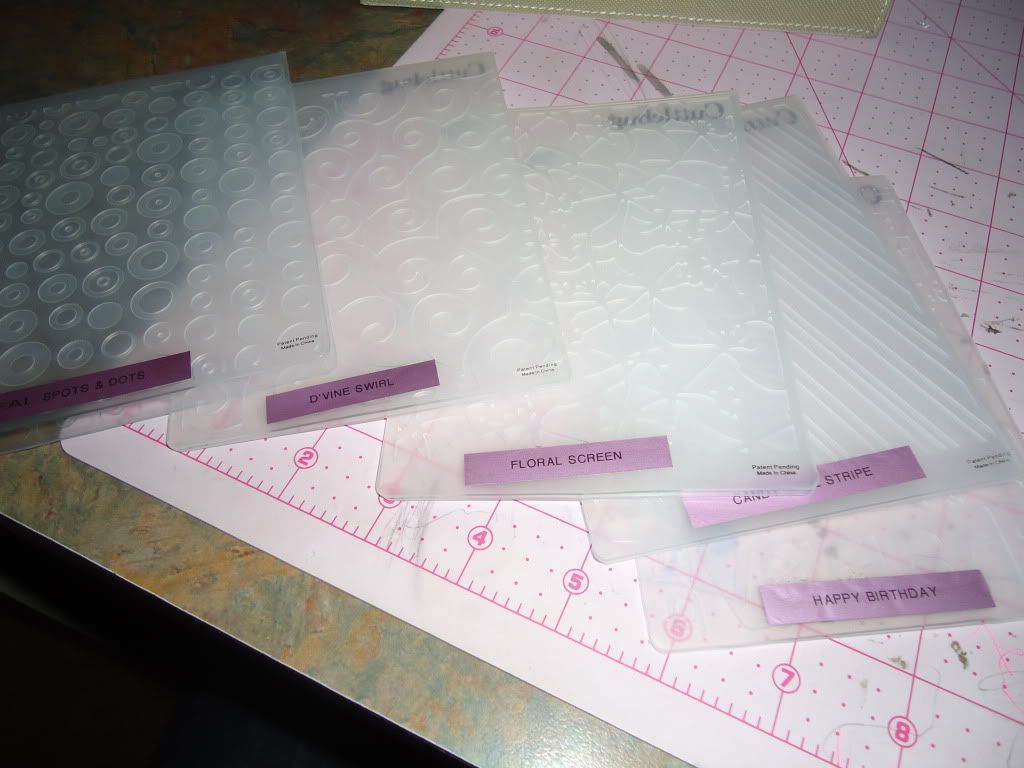
 I store my cuttlebug folders in this little basket I found at Big Lots for $3 and keep my cuttlebug right next to it. This is on a shelf on the wall behind my desk. I labeled all of them by name with a label maker.

 I have a U-shaped desk so I keep my cricut machine on the corner of the desk behind me so I just have to turn around to use it.
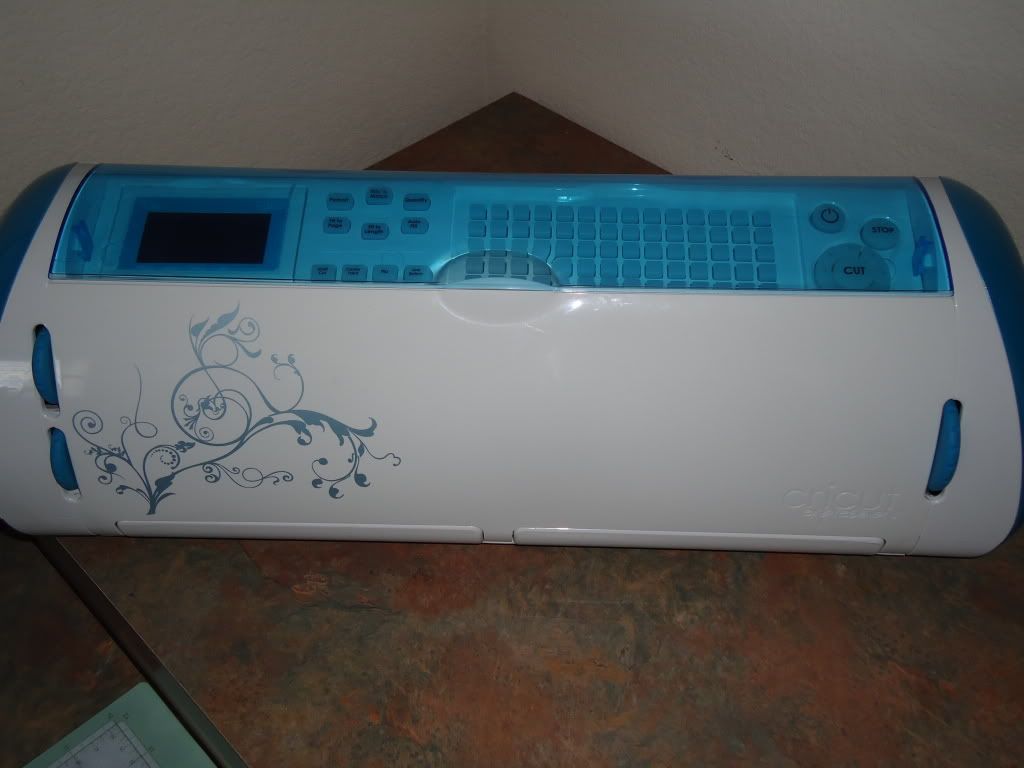 And then I store all of the mats on the wall directly above the machine.
 I have a lot of them because when they go on sale I stock up. LOL!
And then I keep all my tools on this turn table storage from Memory Makers.
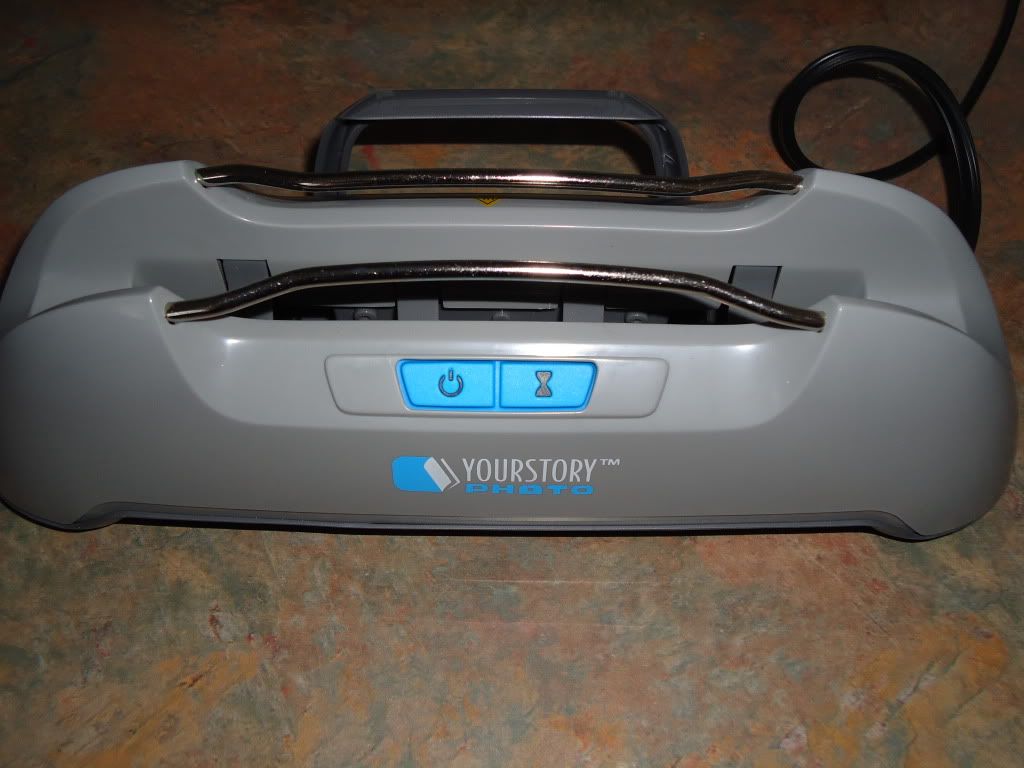
 I also keep myYourStory Photo on the desk behind me and the folders on a desk next to mine on the back wall.
 So Here is a picture of what my room looks like to give you a better idea.
 This picture was taken before I had my cuttlebug and folders so where those cartridges are on the back shelf is now where I keep the cuttlebug.
First, this is how I store my cricut books. I keep them in the top drawer of my desk because I use them so often I need them close by. I don't keep the boxes or the cartridges with them because I use my Gypsy for everything so I very rarely need the cartridges. I keep them in alphabetical order.
And then I keep all my tools on this turn table storage from Memory Makers.

Monday, March 28, 2011
Stretch Your Imagination- SSD DT Challenge
This week for the Sweet Sassy Diva DT Challenge I was asked to pick the challenge. I decided that the challenge should be to use Stretch Your Imagination cartridge and pastel colors. But the real challenge was to use any of the Spring Images on pages 62- 69.
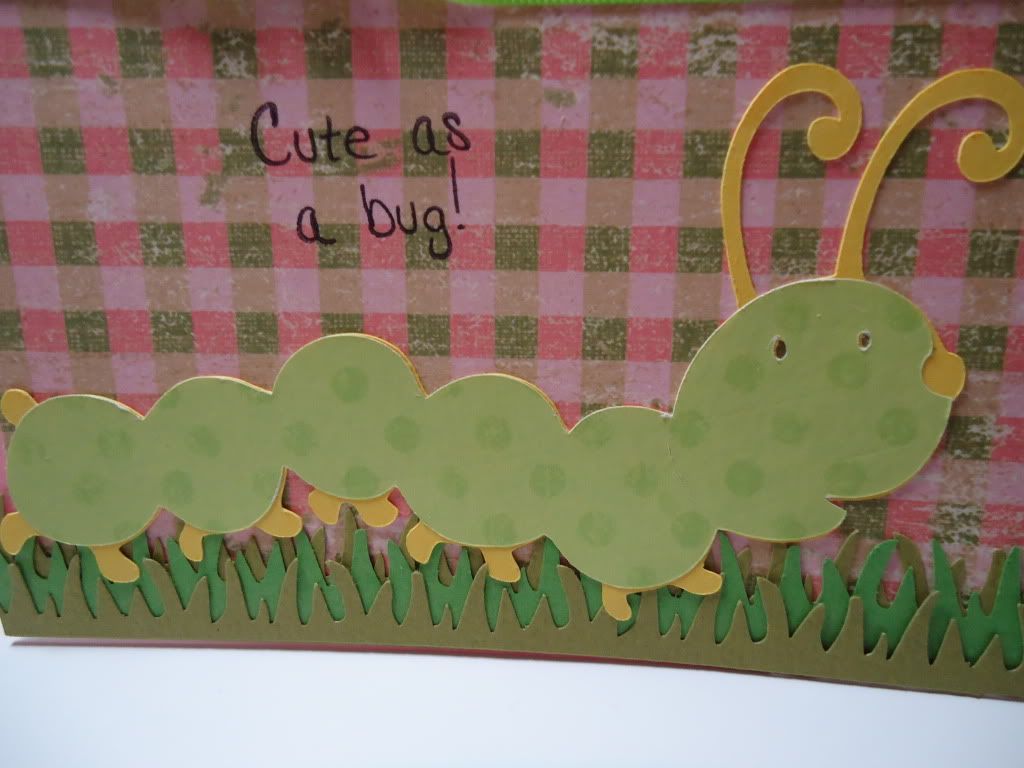
So I decided to use the caterpilar on page 66. Here is the card that I made:
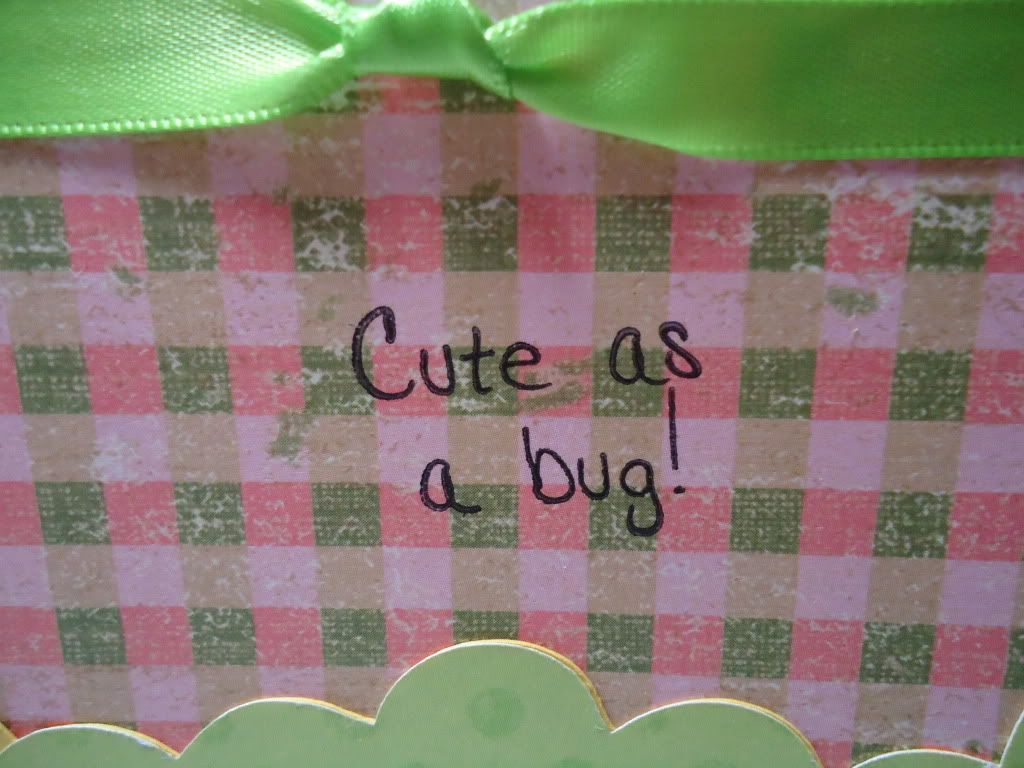
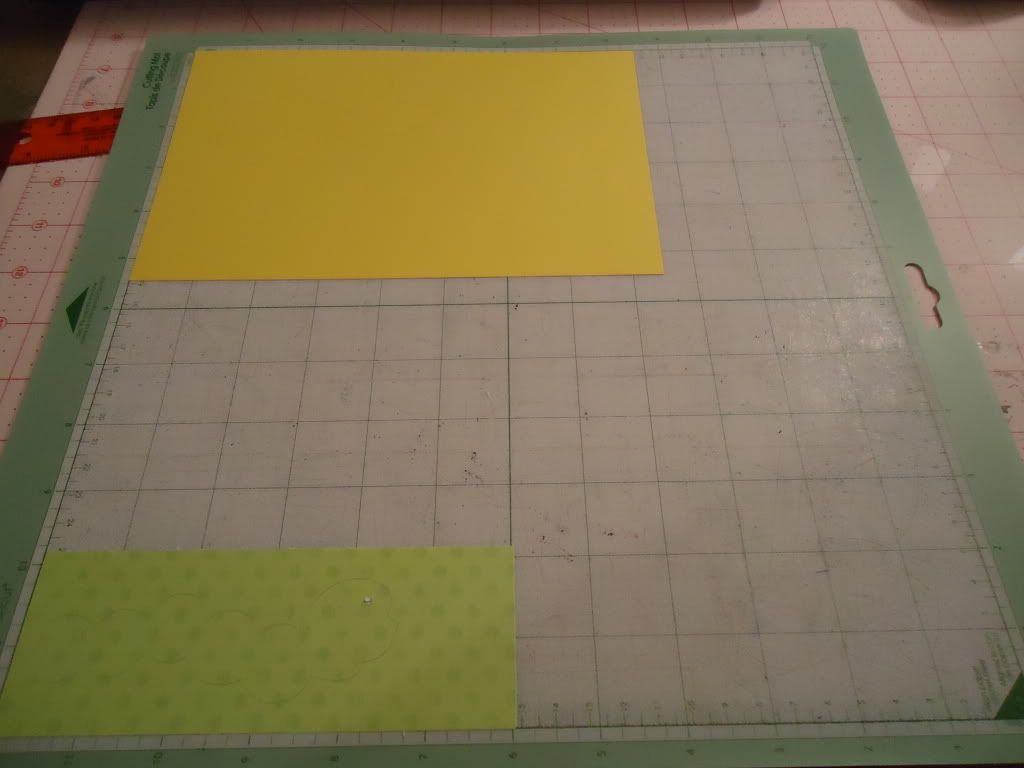
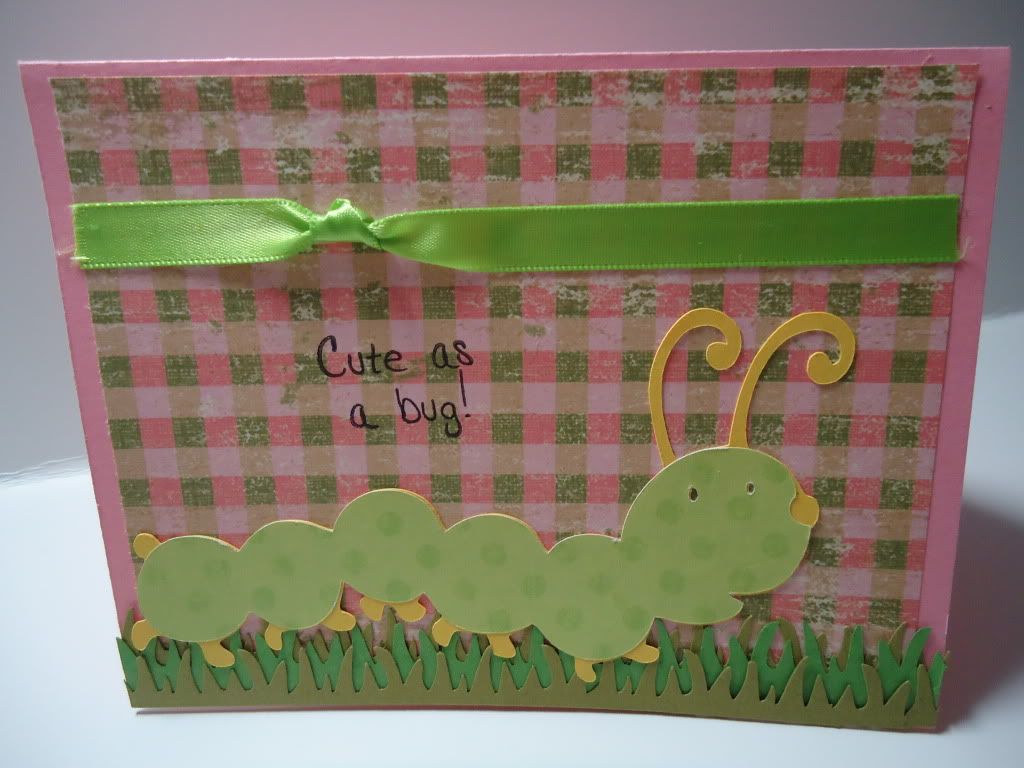 I used Pink, yellow, green and olive green cardstock. The patterned paper is from K & Co. and then the stamps are Buggy Puns by My Pink Stamper.
 Here is how I set the Gypsy up and the paper on the mat.
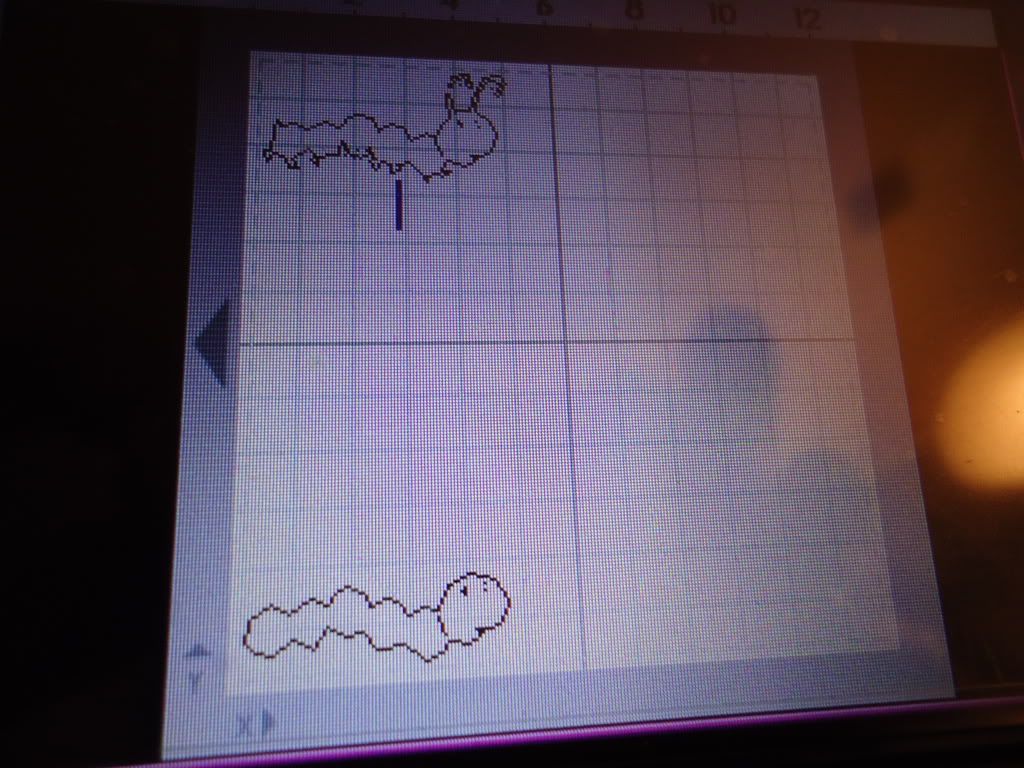
So I decided to use the caterpilar on page 66. Here is the card that I made:
Friday, March 25, 2011
Make Your Own Holiday Blog Hop- March 26 & 27
Hi Everyone
Welcome to the Make Your Own Holiday Blog Hop! The hop will be running from March 26 12:00 am to March 27th 11:59pm est. So you have all weekend to hop along with us. If you are arriving from the very talented Jen at Young’s Scrapping then you are in the right place. If not you can start the hop
over at the lovely Karelj at One By One The Flamingos Are Stealing My Sanity . Karelj is offering an over-all blog candy for those who are hopping along with us. She thought it would be fun to have some holiday-themed candy for this hop--but, of course, made-up holiday items were hard to come by! She decided to do a whole bunch of *regular* holiday themed stamps for you to enjoy. From Fiskars, there is an assorted holiday set; there's an alphabet from All Night Media, a set of 100 plus clear stamps and a storage case from Family Memories, and 5 sets of clear stamps from various dollar bins in big box stores. How to win them? Follow along the blog trail, leaving a comment on each and every blog. On Monday, Karelj will ask her buddy Randy (random.org) to select a blog number (from the list), a day (Saturday is one, Sunday is two), and a comment number from that blog. Please make sure you have left a reliable way to contact you (email is best, in the safe format of **** at **** dot com ) so you can be notified by her personally. If you don't, she’ll have to select another winner
Ok let's get on to the hop. I thought this was an awesome idea. If you had to make a holiday what would you pick and why. Well, of course I came up with Scrapping Again it will be on every March 26 from now on for me. This is a day where a whole day is set aside for crafting! YEA! My favorite thing! This year I got lucky and it is on a Saturday but when it falls on a weekday, I might just have to play hookie from work-- LOL! We will see how that works out! HAHA. So for this hop, I made this cute Spring banner for my girlfriends birthday.
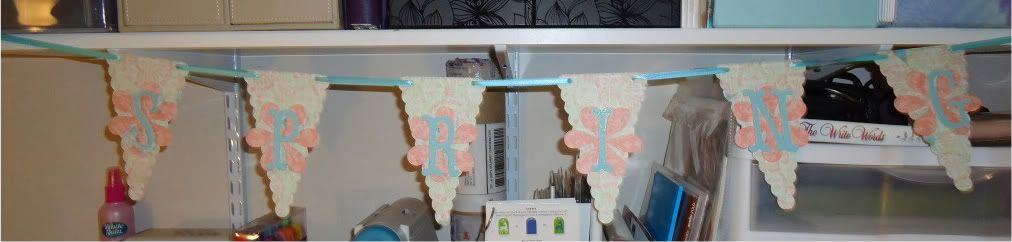
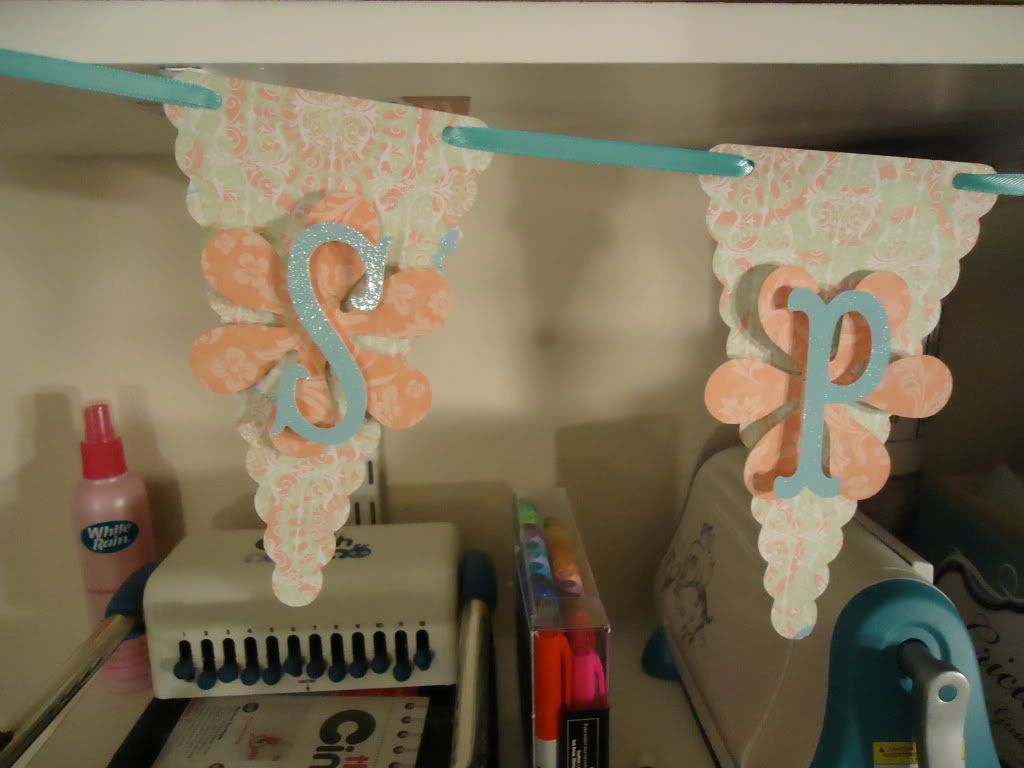
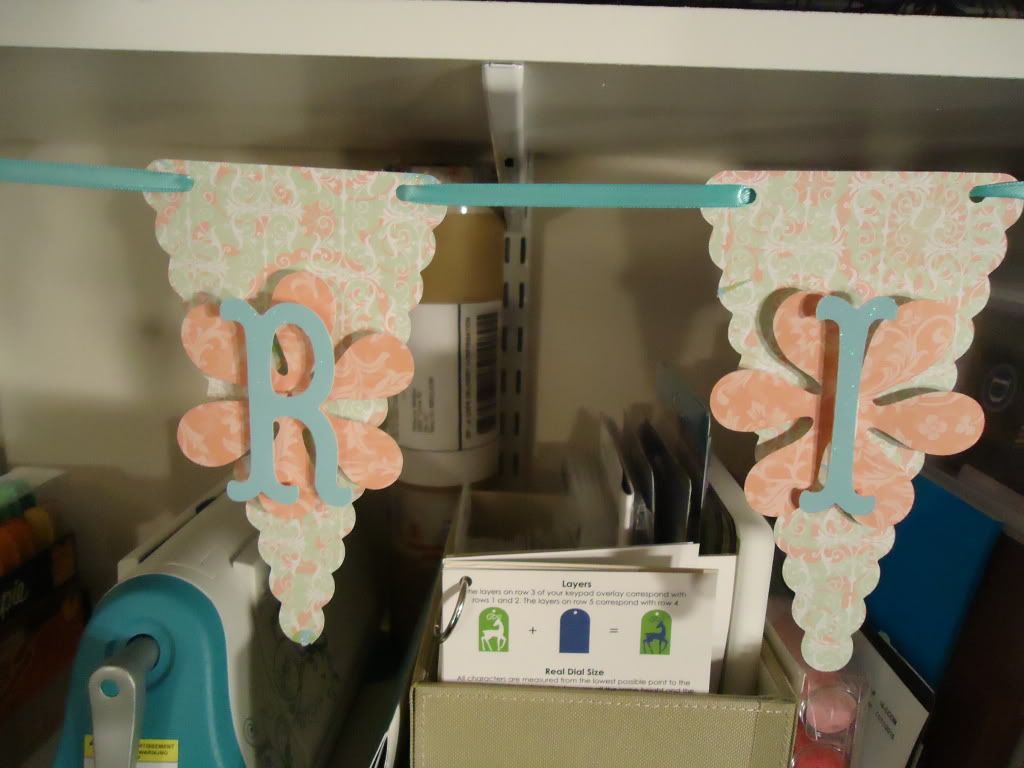
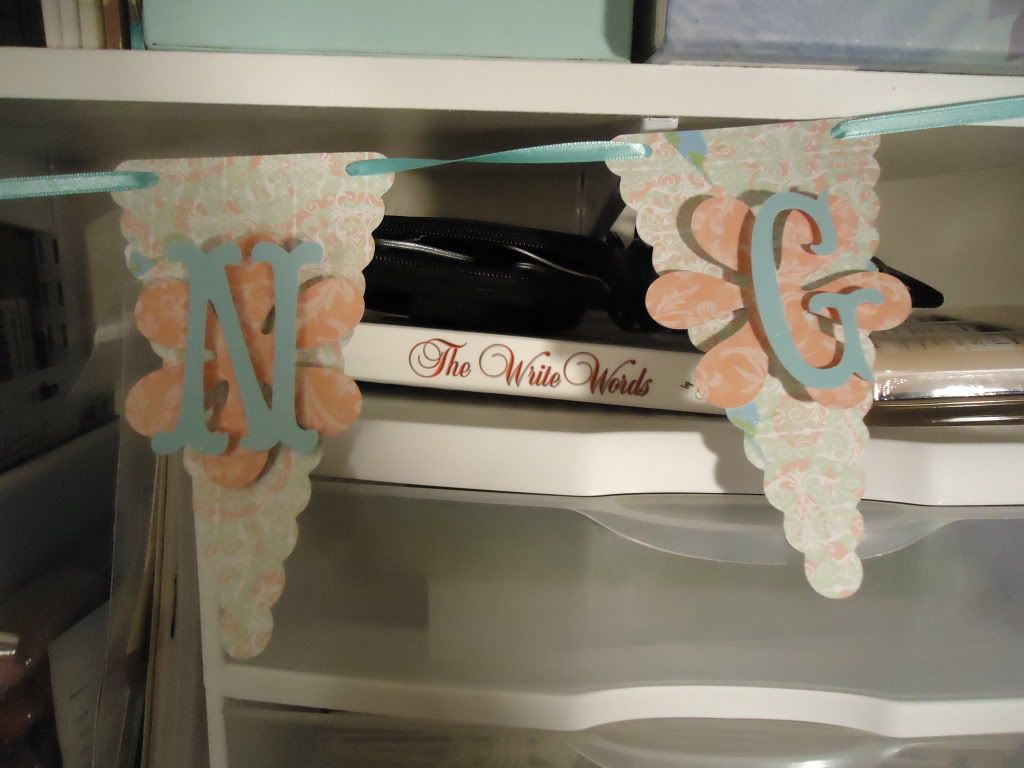 These are the close ups of the banner, you will have to excuse my messing craft shelf behind it.
I used Whimsy DCWV stack and glitter paper from DCWV for the letters.
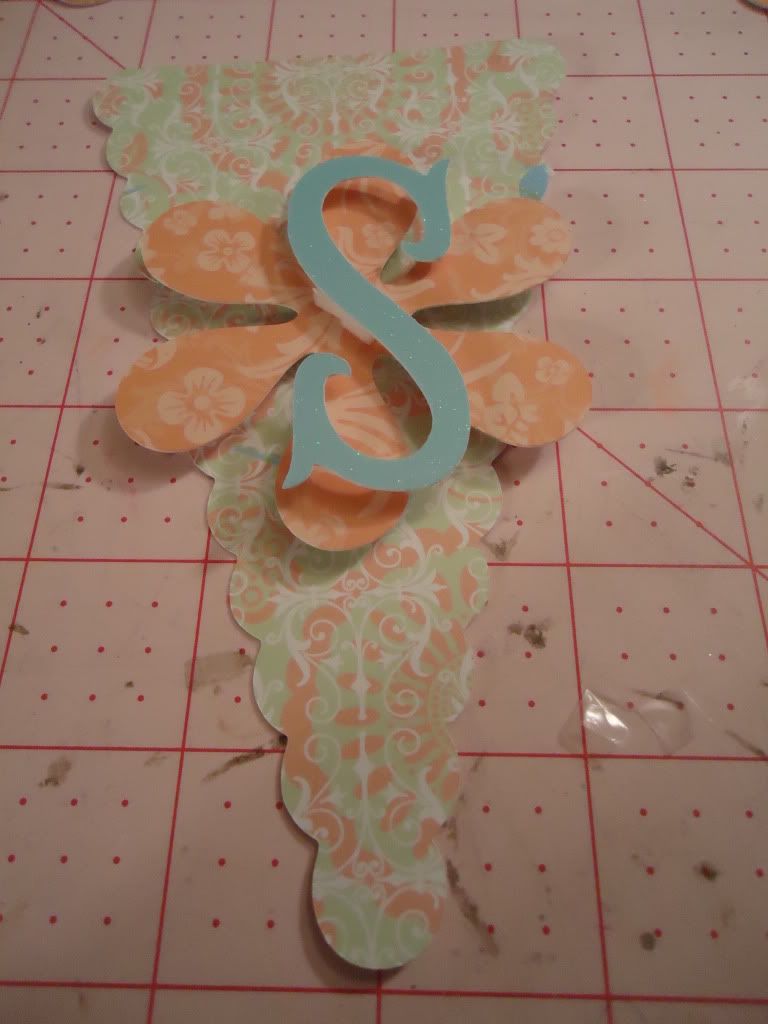
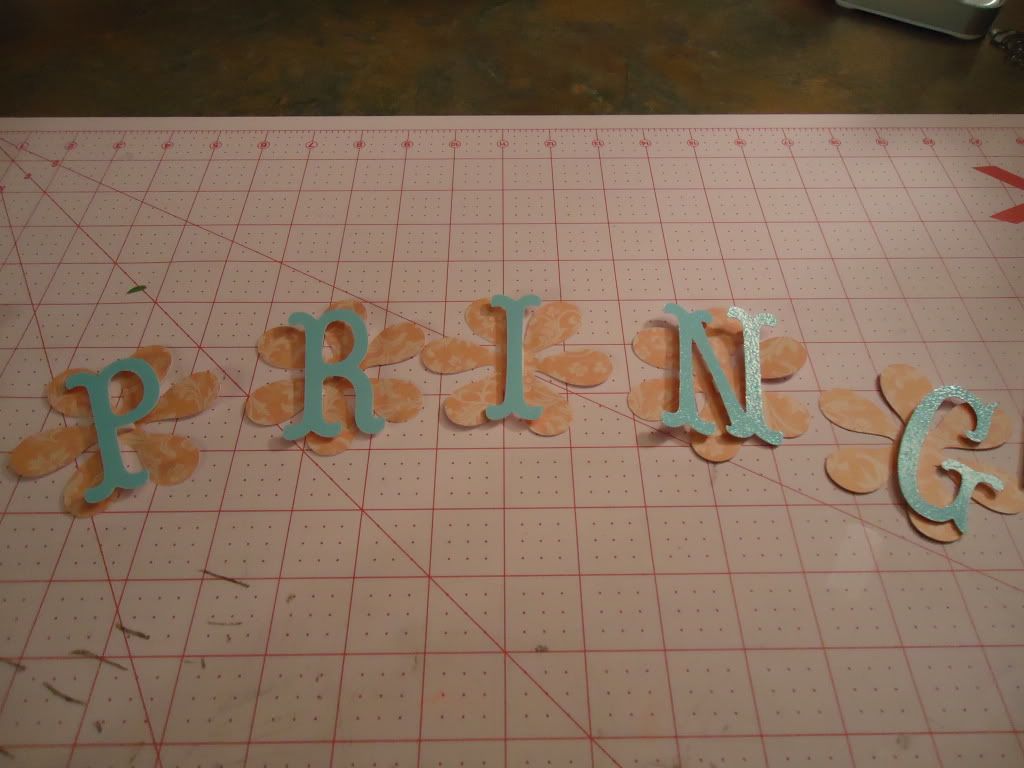
I used Storybook for the letters and Accent Essentials for the flowers, and the banner cuts were from Birthday Bash.
Thank you for coming by today, your next stop on the hop is the very talented Jamie at Glitter, Paper, Stamps, Oh My!
Oh yeah, I almost forget the great blog candy I am giving away! Leave a comment and become a follower to be entered to win. I have a brand new Creative Memories Album. It is the Original 12 x12 album and I have a couple different ones you can choose from. Sorry but for shipping reasons this blog candy is only open to US residents.
And is is a complete list in case you get lost along the way.
1. Karelj at One By One The Flamingos Are Stealing My Sanity at http://www.kareljcreations.com/
2. Janice at Cricut Confessions at http://www.cricutconfessions.com/
3. Summer and Jennifer at The Cricut Diaries at http://www.cricutdiaries.com/
4. Denine at Pumpkin and Spice at http://pumpkinspiceblog.blogspot.com/
5. Colleen at Col’s Creative Corner at http://www.scrappycol.blogspot.com/
6. Mistyrose at Sweet Magnolia Rose at http://sweetmagnoliarose.blogspot.com/
7. Ellen at Card Monkey at http://www.cardmonkey-business.blogspot.com/
8. Rachel at Suburban Crafter http://www.rachelstampshappy.blogspot.com/
9. Monica at Scraps 2 Treasure at http://scraps2treasure.blogspot.com/
10. Jen at Young’s Scrapping at http://www.youngsscrapping.blogspot.com/
11. Becka at Creations With Becka at http://www.creationswithbecka.blogspot.com/
12. Jamie at Glitter, Paper, Stamps, Oh My! at http://www.jamieisacraftymomma.blogspot.com/
13. Michelle at Peanut Butter and jelly Designs at http://peanutbutterandjellydesigns.blogspot.com/
14. Celeste at Touched By A Butterfly at http://touchedbyabutterfly.blogspot.com/
15. Leah at Leah’s Card Designs at http://leahscarddesigns.blogspot.com/
16. Calie at Calie’s Creative Corner at http://www.caliescreativecorner.blogspot.com/
17. Audrey at It’s A Beautiful Life at http://www.audreyscardsbydesign.blogspot.com/
18. Bonnie at A Scrap Above at http://ascrapabove.blogspot.com/
19. Diane at Crafting This Moment at http://www.craftingthismoment.blogspot.com/
20. Nicolette at Beyond Scrapping at http://www.beyondscrapin.blogspot.com/
21. Gina at Gina Thornton Stamping at http://ginathorntonstamping.blogspot.com/
22. Kathryn at Creations With Kathryn at http://www.creationswithkathryn.com/
23. Yolie at Just Yolie, Just Create at http://justyolie.com/
24. Patti at Short ‘N Scrappy at http://www.shortnscrappy.com/
25. Krista Orr at Scrapaleupagus at http://www.scrapaleupagus.blogspot.com/
26. Kay Craig at 100 Things at http://kopperhead100.blogspot.com/
27. Jane Hollon at Sneezy’s Ramblings at http://sneezy1956.blogspot.com/
28. Jennifer Anderson at Scrappin’ Lil’ Turtle at http://www.creativearmywife.blogspot.com/
Welcome to the Make Your Own Holiday Blog Hop! The hop will be running from March 26 12:00 am to March 27th 11:59pm est. So you have all weekend to hop along with us. If you are arriving from the very talented Jen at Young’s Scrapping then you are in the right place. If not you can start the hop
over at the lovely Karelj at One By One The Flamingos Are Stealing My Sanity . Karelj is offering an over-all blog candy for those who are hopping along with us. She thought it would be fun to have some holiday-themed candy for this hop--but, of course, made-up holiday items were hard to come by! She decided to do a whole bunch of *regular* holiday themed stamps for you to enjoy. From Fiskars, there is an assorted holiday set; there's an alphabet from All Night Media, a set of 100 plus clear stamps and a storage case from Family Memories, and 5 sets of clear stamps from various dollar bins in big box stores. How to win them? Follow along the blog trail, leaving a comment on each and every blog. On Monday, Karelj will ask her buddy Randy (random.org) to select a blog number (from the list), a day (Saturday is one, Sunday is two), and a comment number from that blog. Please make sure you have left a reliable way to contact you (email is best, in the safe format of **** at **** dot com ) so you can be notified by her personally. If you don't, she’ll have to select another winner
Ok let's get on to the hop. I thought this was an awesome idea. If you had to make a holiday what would you pick and why. Well, of course I came up with Scrapping Again it will be on every March 26 from now on for me. This is a day where a whole day is set aside for crafting! YEA! My favorite thing! This year I got lucky and it is on a Saturday but when it falls on a weekday, I might just have to play hookie from work-- LOL! We will see how that works out! HAHA. So for this hop, I made this cute Spring banner for my girlfriends birthday.
I used Whimsy DCWV stack and glitter paper from DCWV for the letters.
I used Storybook for the letters and Accent Essentials for the flowers, and the banner cuts were from Birthday Bash.
Thank you for coming by today, your next stop on the hop is the very talented Jamie at Glitter, Paper, Stamps, Oh My!
Oh yeah, I almost forget the great blog candy I am giving away! Leave a comment and become a follower to be entered to win. I have a brand new Creative Memories Album. It is the Original 12 x12 album and I have a couple different ones you can choose from. Sorry but for shipping reasons this blog candy is only open to US residents.
And is is a complete list in case you get lost along the way.
1. Karelj at One By One The Flamingos Are Stealing My Sanity at http://www.kareljcreations.com/
2. Janice at Cricut Confessions at http://www.cricutconfessions.com/
3. Summer and Jennifer at The Cricut Diaries at http://www.cricutdiaries.com/
4. Denine at Pumpkin and Spice at http://pumpkinspiceblog.blogspot.com/
5. Colleen at Col’s Creative Corner at http://www.scrappycol.blogspot.com/
6. Mistyrose at Sweet Magnolia Rose at http://sweetmagnoliarose.blogspot.com/
7. Ellen at Card Monkey at http://www.cardmonkey-business.blogspot.com/
8. Rachel at Suburban Crafter http://www.rachelstampshappy.blogspot.com/
9. Monica at Scraps 2 Treasure at http://scraps2treasure.blogspot.com/
10. Jen at Young’s Scrapping at http://www.youngsscrapping.blogspot.com/
11. Becka at Creations With Becka at http://www.creationswithbecka.blogspot.com/
12. Jamie at Glitter, Paper, Stamps, Oh My! at http://www.jamieisacraftymomma.blogspot.com/
13. Michelle at Peanut Butter and jelly Designs at http://peanutbutterandjellydesigns.blogspot.com/
14. Celeste at Touched By A Butterfly at http://touchedbyabutterfly.blogspot.com/
15. Leah at Leah’s Card Designs at http://leahscarddesigns.blogspot.com/
16. Calie at Calie’s Creative Corner at http://www.caliescreativecorner.blogspot.com/
17. Audrey at It’s A Beautiful Life at http://www.audreyscardsbydesign.blogspot.com/
18. Bonnie at A Scrap Above at http://ascrapabove.blogspot.com/
19. Diane at Crafting This Moment at http://www.craftingthismoment.blogspot.com/
20. Nicolette at Beyond Scrapping at http://www.beyondscrapin.blogspot.com/
21. Gina at Gina Thornton Stamping at http://ginathorntonstamping.blogspot.com/
22. Kathryn at Creations With Kathryn at http://www.creationswithkathryn.com/
23. Yolie at Just Yolie, Just Create at http://justyolie.com/
24. Patti at Short ‘N Scrappy at http://www.shortnscrappy.com/
25. Krista Orr at Scrapaleupagus at http://www.scrapaleupagus.blogspot.com/
26. Kay Craig at 100 Things at http://kopperhead100.blogspot.com/
27. Jane Hollon at Sneezy’s Ramblings at http://sneezy1956.blogspot.com/
28. Jennifer Anderson at Scrappin’ Lil’ Turtle at http://www.creativearmywife.blogspot.com/
SSD- DT Challenge Easel Card
Hi Everyone
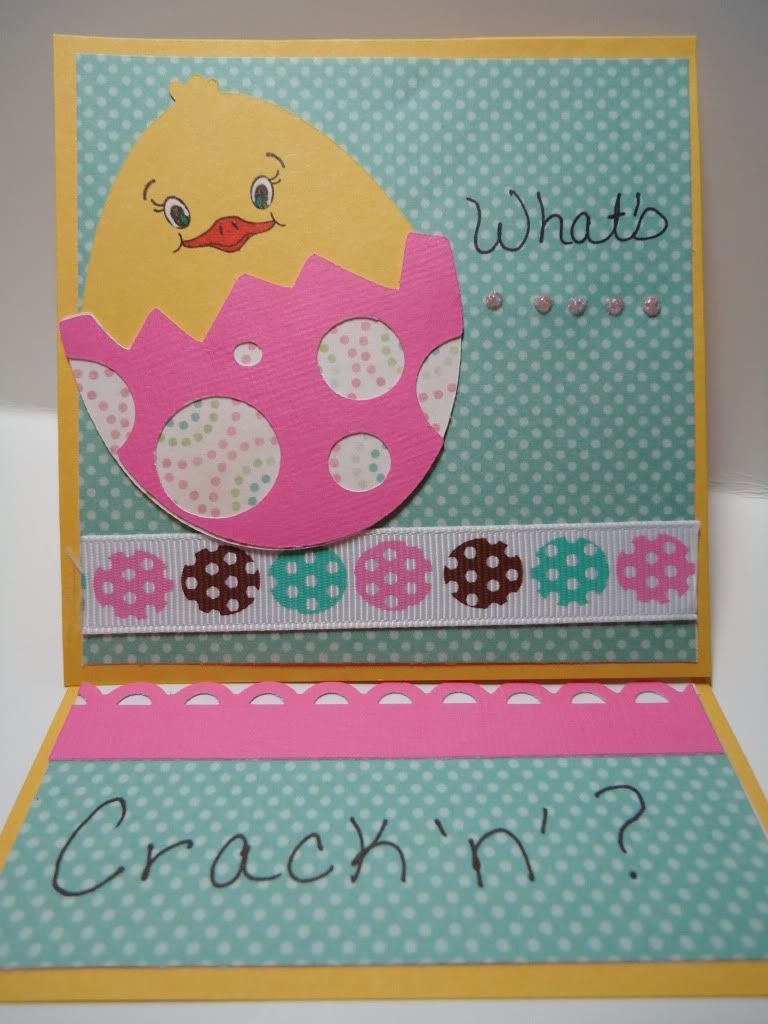
This week for the Sweet Sassy Diva's DT challenge we were asked to make an Easel card. I wasn't sure what this was at first but I found this great tutorial at Split Coast Stampers website. The tutorial is really wonderful, but I think I have a hearing problem because at first I just could not figure out the whole flap thing, but after watching the video 3 times and taking my card apart once I finally got it! WOOHOO!
I am so ready for Spring to come but it is still snowing in my neck of the woods. So to get in the Spring mood I made this cute Chick card.
 And this is the cool part, you can make it stand up like an easel to showcase the card.
 Here is what I used to make the card:
Yellow and Pink Card Stock
Patterned paper from my stash
PK Critter faces
Simply Charmed- Love this cart! It is a must have...
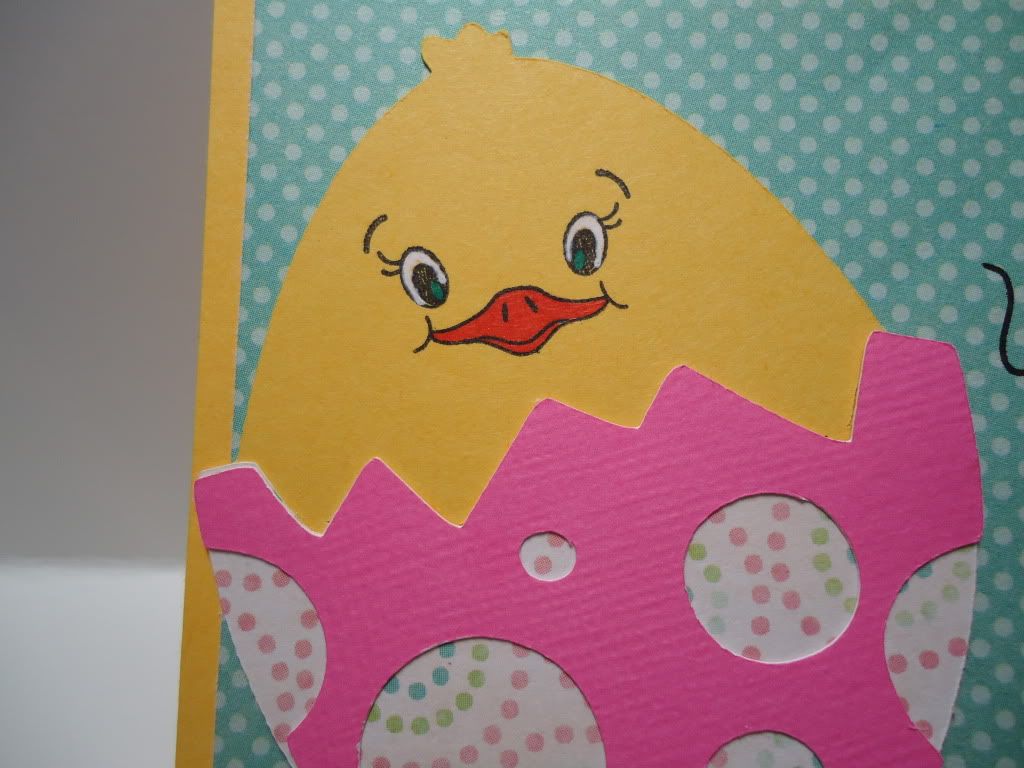
I cut the chick out at 2.75" and then wrote the saying since I couldn't find a stamp with what I wanted.
I colored in the beak and eyes with markers.
This week for the Sweet Sassy Diva's DT challenge we were asked to make an Easel card. I wasn't sure what this was at first but I found this great tutorial at Split Coast Stampers website. The tutorial is really wonderful, but I think I have a hearing problem because at first I just could not figure out the whole flap thing, but after watching the video 3 times and taking my card apart once I finally got it! WOOHOO!
I am so ready for Spring to come but it is still snowing in my neck of the woods. So to get in the Spring mood I made this cute Chick card.
Yellow and Pink Card Stock
Patterned paper from my stash
PK Critter faces
Simply Charmed- Love this cart! It is a must have...
I cut the chick out at 2.75" and then wrote the saying since I couldn't find a stamp with what I wanted.
I colored in the beak and eyes with markers.
Tuesday, March 22, 2011
Lucky Charm blog hop Winner
Hi everyone
Thank you all so much for joining in on the Lucky Charm blog hop, it was so much fun reading all of your wonderful comments, and I am still trying to visit all of your blogs too. Sorry I didn't post this yesterday but I was feeling a little under the weather, but I am feeling much better today.
So I used Random.org and it pulled #29 as the winner
Congrats the Jenn she said:
Jenn said... 29 So cute!! Great project, just love the espression on his face haha. TFS!
smile4jenn(at)hotmail(dot)com
Please email me your shipping information at scrapperbecka at yahoo dot com and I will mail out the cart. I need to hear from you by March 27th or I will have to draw another winner.
Thursday, March 17, 2011
Lucky Charm Blog Hop! & Cricut Lite Giveaway!
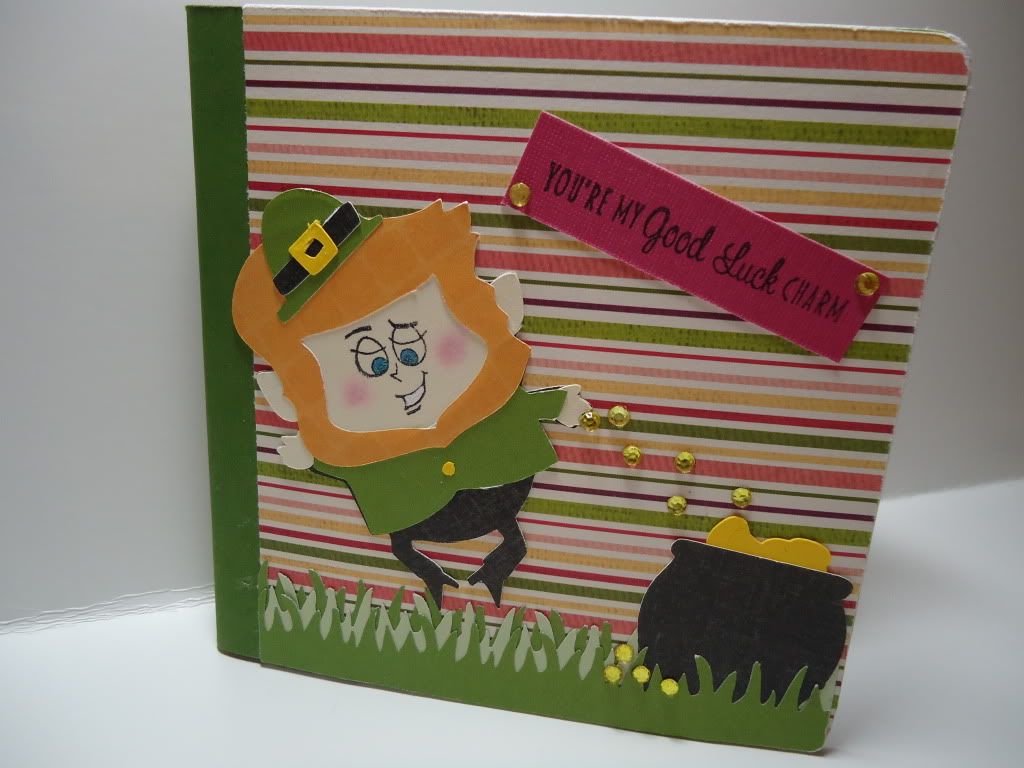
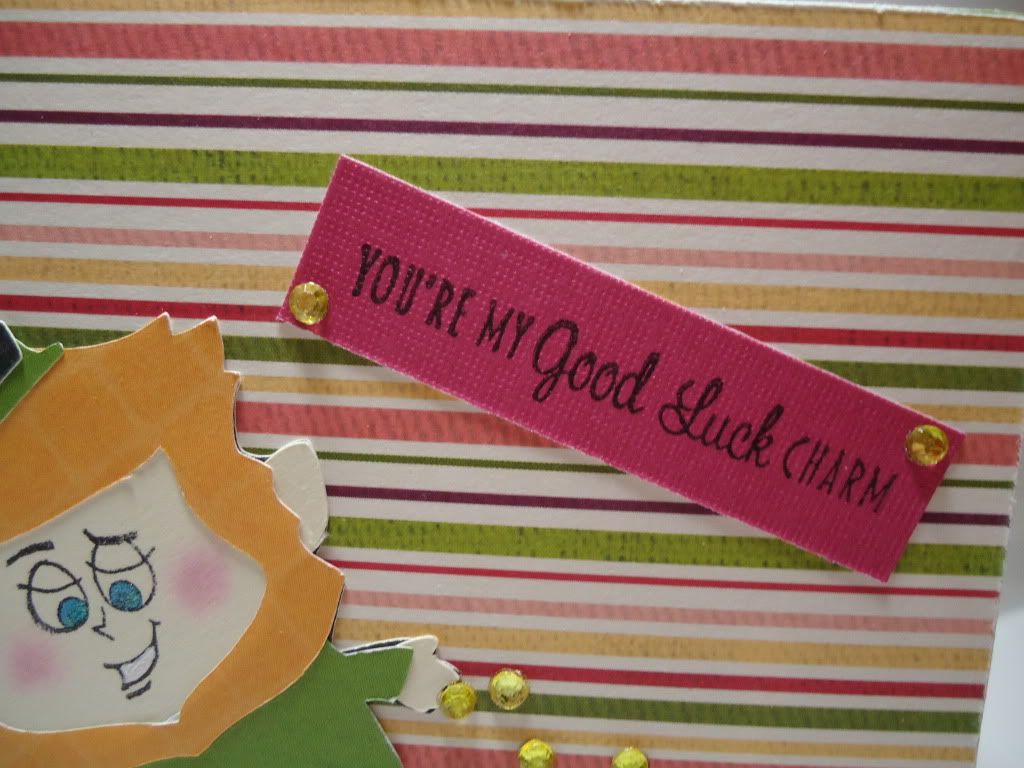
Welcome to my Blog and the Lucky Charm Blog Hop! If you've come from visiting Carol you're in the right place. If you were just looking at my blog and want to play along with our blog hopping fun, you can start at the beginning at Giselle - http://crossmyheartpapercrafts.blogspot.com/. This blog hop is all about creating something for the lucky charm in your life.. So I created a notebook for my mom. she is one of my bestfriends and is always there for me. She always has the right words to make me feel better, never ending advice and just makes my life better all around.
 I bought this notebook at Michaels in the $1 section ( WOOHOO love the dollar section), but even better it was 50% off- heck yes! How awesome is that. It is a lined notebook and the covers are chipboard- it doesn't get any better than that!
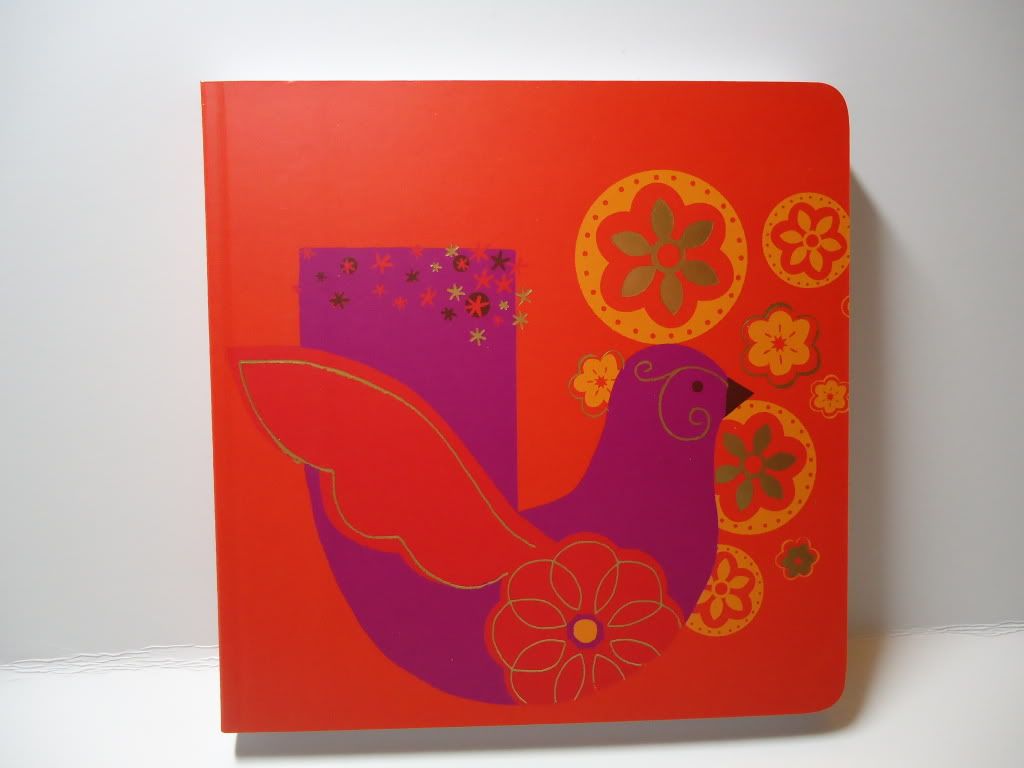
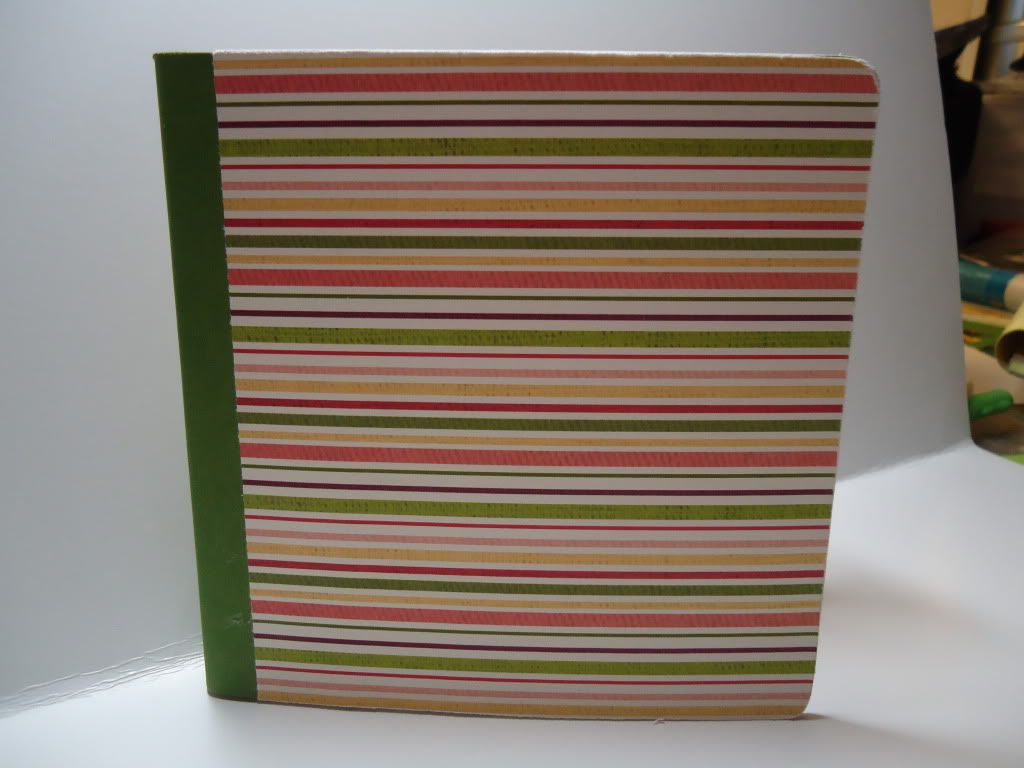 I covered the binding with green cardstock and the added the striped patterned paper to the front and back covers. Sanding down the edges so it fits perfectly on the covers.
Next I used my Gypsy to design a St. Patricks day theme to go on the cover. This is how I set it up on my Gypsy. I used Simply Charmed, which is the 1st time I have used this cartridge and let me say it is a MUST have- so many great images on it.
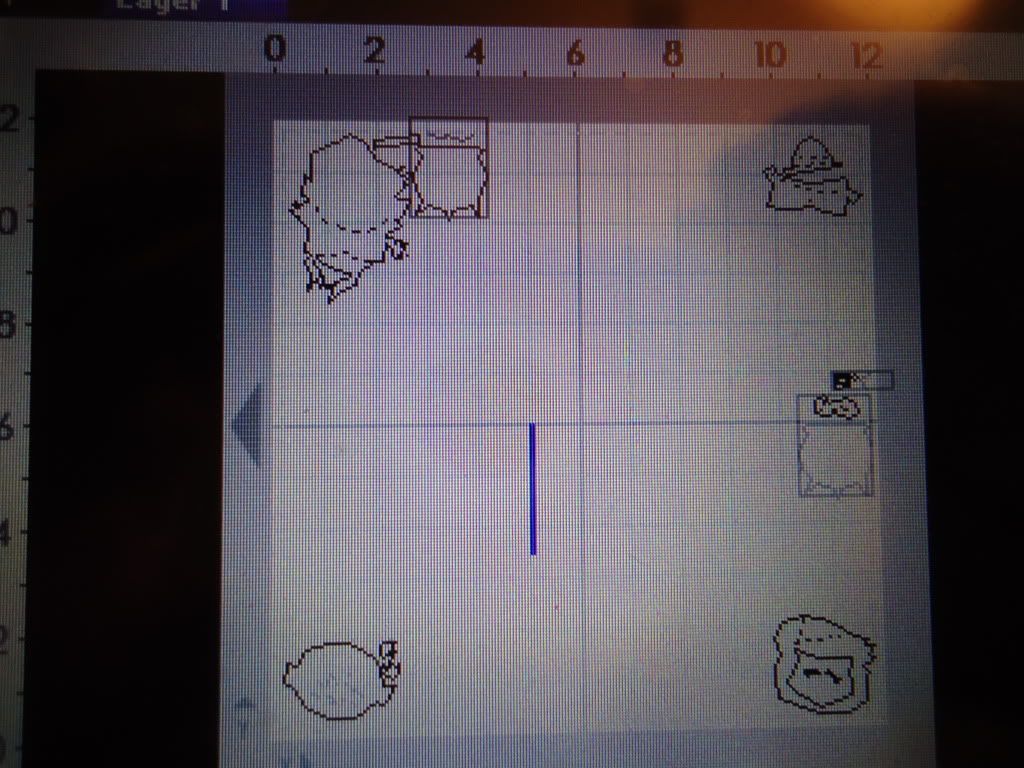
The grayed out areas are the parts I did not want to cut. Here is how I set the cardstock up on the mat.
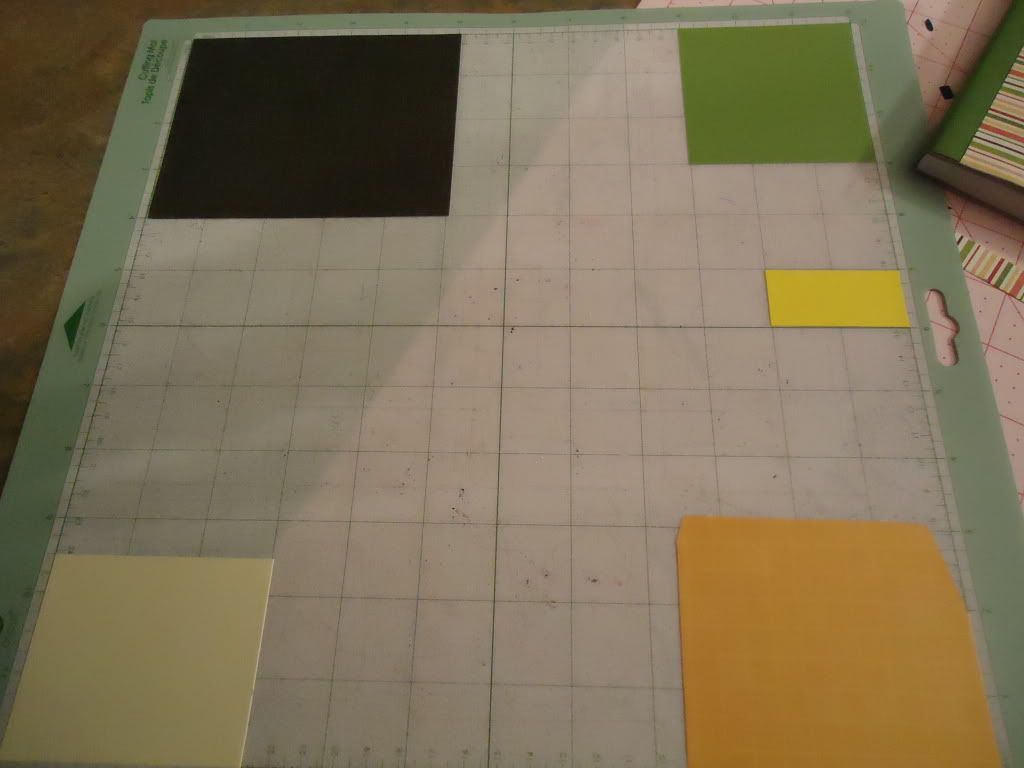 I used mostly scrap paper for all the cuts. It seems like I have so many scraps, but with the Gypsy it is so easy to tell what size of paper you need and where to put it on the mat. I cut the little guy out at 3" and the pot of gold at 2"
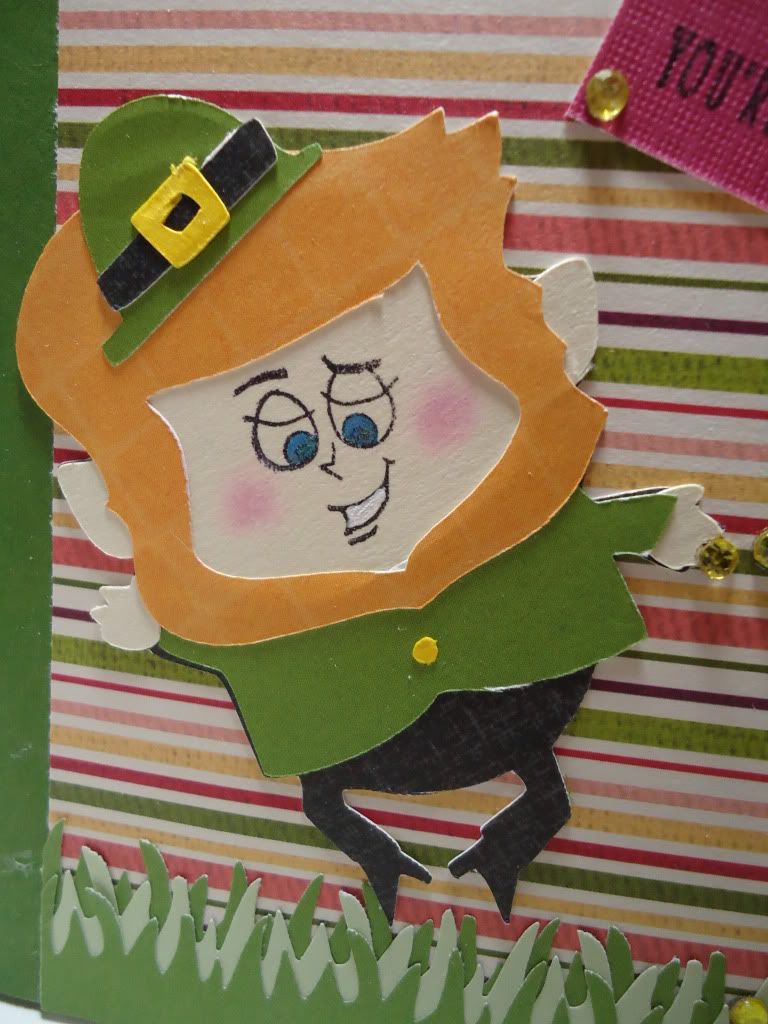 I used Pk Retro Dolls stamp for the face and a white gel pen for his teeth, blue gel pen for his eyes and pink chalk for his cheeks.
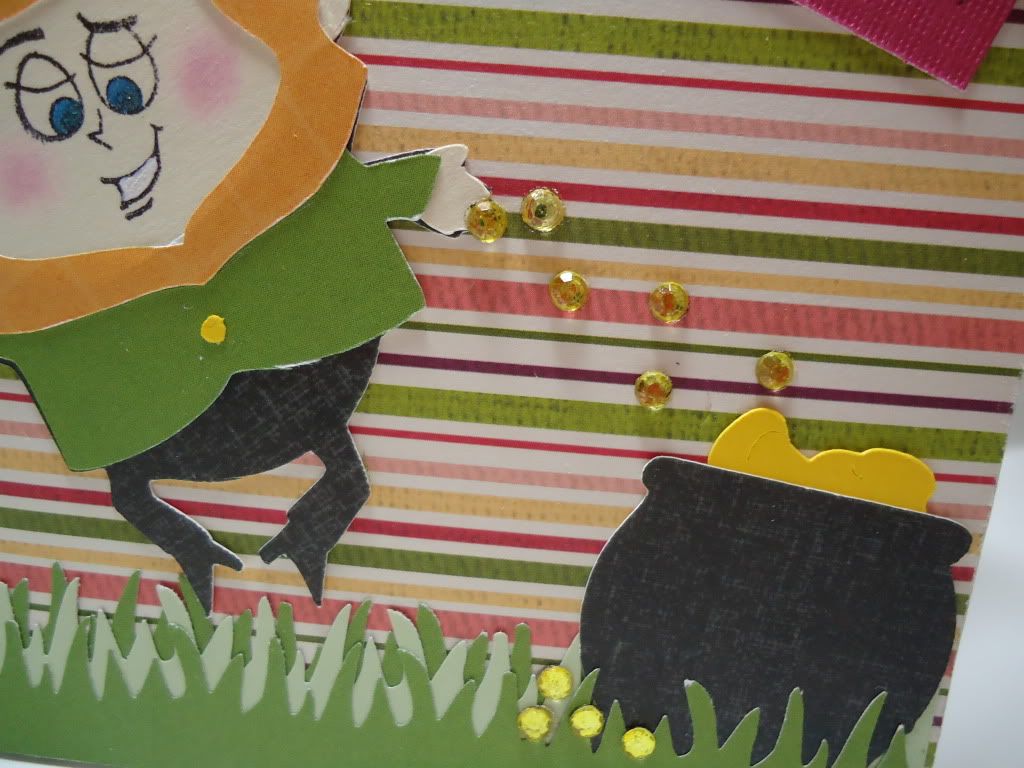 The gold he is throwing out of his hand is bling from Imaginisce and I used the I-rock tool to adhere it. The grass is a Friskers punch.
 My super cool Circle Pal Jenny K sent me this awesome stamp that just goes perfectly with the theme of the hop.
Ok, so now on to the good stuff! Who wants some blog candy??? I know you do! Okay, well for the hop I am giving away B is for Boy Cricut Lite Cartridge.
 You have to do 2 things to enter....
1. Must be a follower
2. Must leave a comment with a way to get a hold of you
Simple, Simple Simple.... I will draw a winner Monday and post it by Monday Night.
I hope you have enjoyed my project. Thank you for visiting my blog. Your next stop is Linda - http://www.fancyframework.com/ go check out the awesome creations she has made for this hop.
Thank you Giselle and Nadia for putting together this awesome blog hop and all the hardwork you have done to make this an awesome event.
Don't forget to stop by next weekend for the Make Your Own Holiday Blog Hop
Here is a list of the blogs in the hop in case you get lost along the way:
Giselle - http://crossmyheartpapercrafts.blogspot.com/
Nadia - http://nadiasbeautifulmess.blogspot.com/
Jennifer - http://creativearmywife.blogspot.com/
Alina - http://neverstopscrapping.blogspot.com/
Kim - http://rickettscricuts.blogspot.com/
Yolonda - http://www.craftyscentiments.blogspot.com/
Donna - http://donnasdreamworks.blogspot.com/
Carol - http://caroleesscrappinspot.blogspot.com/
Rebecca - http://www.creationswithbecka.blogspot.com/ ME!
Linda - http://www.fancyframework.com/ NEXT STOP
Amy - http://amydesigns.blogspot.com/
Lisa - http://prettypaperprettyribbons.blogspot.com/
Sue- http://ScrappinSuzy.blogspot.com/
Carrie - http://paperglitterstamps.blogspot.com/
Patricia - http://creativediva98.blogspot.com/
Wendy - http://wendyscreativecraftingcorner.blogspot.com/
Kimi & Pamela - http://lovebugcreations3.blogspot.com/
Darcy - http://dlmbscrapping-time2create.blogspot.com/
Julie - http://www.facebook.com/l.php?u=http%3A%2F%2Ftidbitsnscraps.blogspot.com%2F&h=2aba9
Shawnte - http://shawnteparks.blogspot.com/
Amber - http://www.pixiperfectcreations.blogspot.com/
Melissa - http://adventuresinheels.com/
This is what it looked like originally.
Next I used my Gypsy to design a St. Patricks day theme to go on the cover. This is how I set it up on my Gypsy. I used Simply Charmed, which is the 1st time I have used this cartridge and let me say it is a MUST have- so many great images on it.
The grayed out areas are the parts I did not want to cut. Here is how I set the cardstock up on the mat.
Ok, so now on to the good stuff! Who wants some blog candy??? I know you do! Okay, well for the hop I am giving away B is for Boy Cricut Lite Cartridge.

1. Must be a follower
2. Must leave a comment with a way to get a hold of you
Simple, Simple Simple.... I will draw a winner Monday and post it by Monday Night.
I hope you have enjoyed my project. Thank you for visiting my blog. Your next stop is Linda - http://www.fancyframework.com/ go check out the awesome creations she has made for this hop.
Thank you Giselle and Nadia for putting together this awesome blog hop and all the hardwork you have done to make this an awesome event.
Don't forget to stop by next weekend for the Make Your Own Holiday Blog Hop
Here is a list of the blogs in the hop in case you get lost along the way:
Giselle - http://crossmyheartpapercrafts.blogspot.com/
Nadia - http://nadiasbeautifulmess.blogspot.com/
Jennifer - http://creativearmywife.blogspot.com/
Alina - http://neverstopscrapping.blogspot.com/
Kim - http://rickettscricuts.blogspot.com/
Yolonda - http://www.craftyscentiments.blogspot.com/
Donna - http://donnasdreamworks.blogspot.com/
Carol - http://caroleesscrappinspot.blogspot.com/
Rebecca - http://www.creationswithbecka.blogspot.com/ ME!
Linda - http://www.fancyframework.com/ NEXT STOP
Amy - http://amydesigns.blogspot.com/
Lisa - http://prettypaperprettyribbons.blogspot.com/
Sue- http://ScrappinSuzy.blogspot.com/
Carrie - http://paperglitterstamps.blogspot.com/
Patricia - http://creativediva98.blogspot.com/
Wendy - http://wendyscreativecraftingcorner.blogspot.com/
Kimi & Pamela - http://lovebugcreations3.blogspot.com/
Darcy - http://dlmbscrapping-time2create.blogspot.com/
Julie - http://www.facebook.com/l.php?u=http%3A%2F%2Ftidbitsnscraps.blogspot.com%2F&h=2aba9
Shawnte - http://shawnteparks.blogspot.com/
Amber - http://www.pixiperfectcreations.blogspot.com/
Melissa - http://adventuresinheels.com/
Tuesday, March 15, 2011
SSD- DT Challenge Newspaper
Good morning everyone
This week over at Sweet Sassy Diva, the design team was asked to make a project featuring newspaper and the color green. I decided to make this great football card.
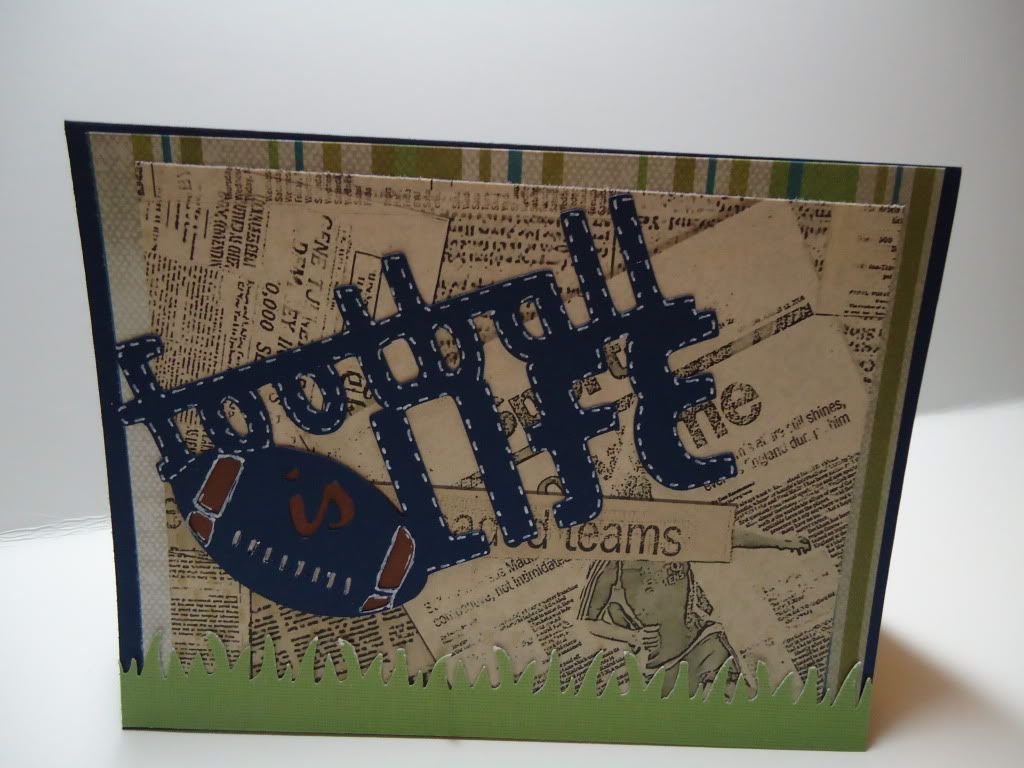
I used Sports Mania cartridge and this is how I set it up on the Gypsy and the paper on the mat.


We had to use some form of newspaper for this project, and I had this cool paper from CTMH so I decided to incorporate it into the project. The paper is from the Sports pack so it is about sports. So that is why I decided to use the football saying from Sports Mania.

Recipe
blue,brown and green cardstock
newpaper print from CTMH
Sports Mania cartridge- saying cut at 3"
White Gel Pen
Monday, March 14, 2011
Dinosaur Birthday Invitiations
Good Morning
Is everyone ready for what this wonderful Monday will bring to us?
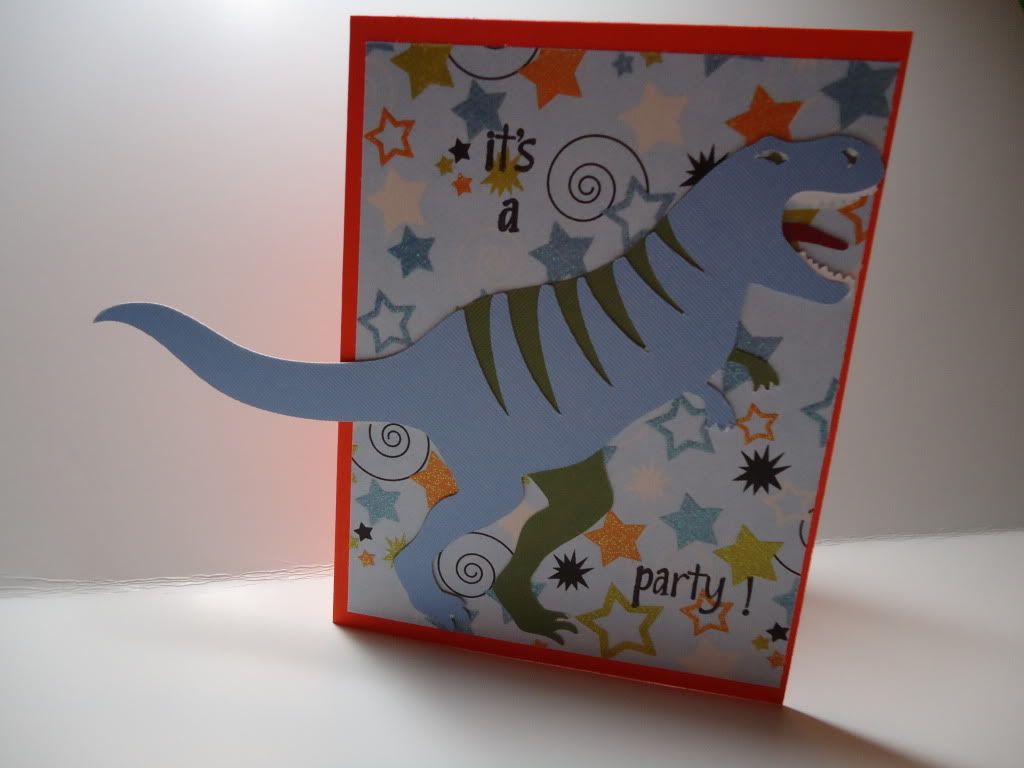
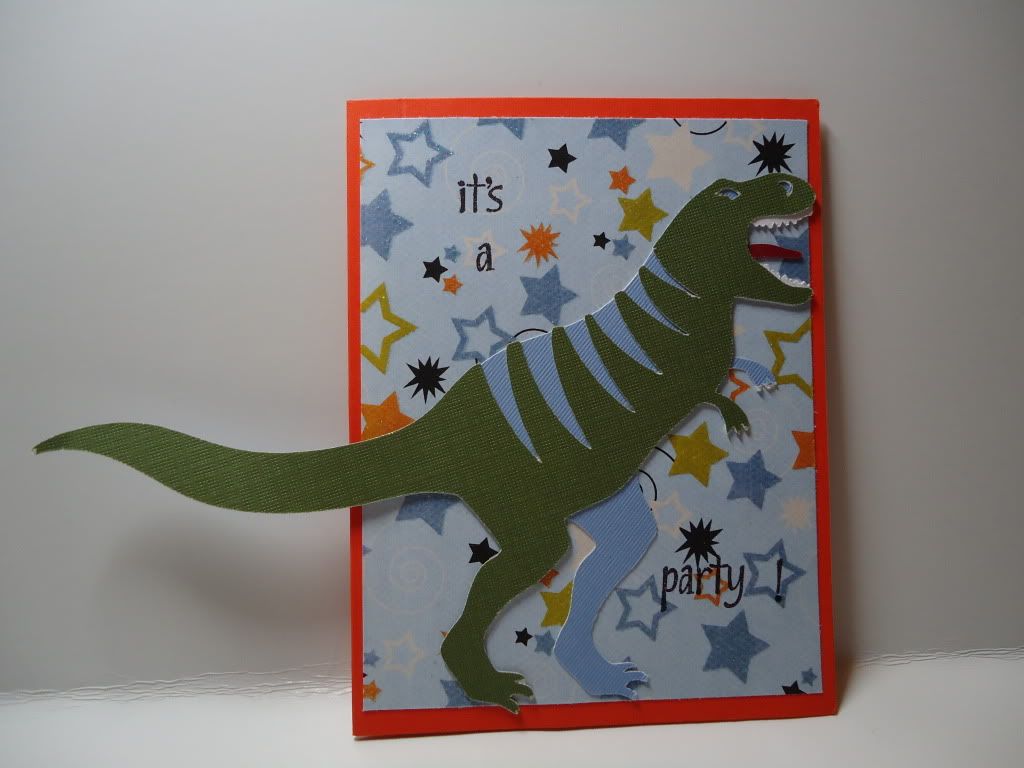
I wanted to share with you these adorable dinosaur birthday invitiations I made for my son's birthday party. His favorite color is blue and he picked blue and green for the dinosaurs colors.
Is everyone ready for what this wonderful Monday will bring to us?
I wanted to share with you these adorable dinosaur birthday invitiations I made for my son's birthday party. His favorite color is blue and he picked blue and green for the dinosaurs colors.
I used orange card stock for the base of the card which is an A-2 card. Then light blue and olive green DCWV cardstock. The patterned paper is from a party time stack I had.
The Dinosaur is cut from Dinosaur Tracks.
I just wanted to remind all of you about the Lucky Charm Blog Hop that starts on March 17th this week. There are a lot of talented ladies participating in the hop and I will be giving away a great prize and I sure there will also be tons of great prizes along the hop. So come hop along with us on Thursday.Giselle &Nadia have been working really hard to put his blog together and I can't wait for Thursday.
Wednesday, March 9, 2011
SDD DT Challenge- Shells
Hi Everyone, Rebecca here today. This week Sweet Sassy Diva asked us to make a project with shells. I made this seashore card.
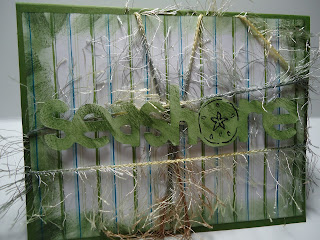

So I used Life's a Beach for the saying, it is cut at 1.15", this is an A-2 size card of olive cardstard, and light green cardstock for the saying. I outlined the sand dollar with a black pen, I inked the edges with CTMH Winter Ivy ink.
Sunday, March 6, 2011
Cricut Circle Magazine Challenge
This month for the Cricut circle magazine challenge we were asked to create a project with our new Exclusive cartridge we got last month -Cricut Everyday. We had to include 3 cuts from the cartridge. Here is what I came up with:

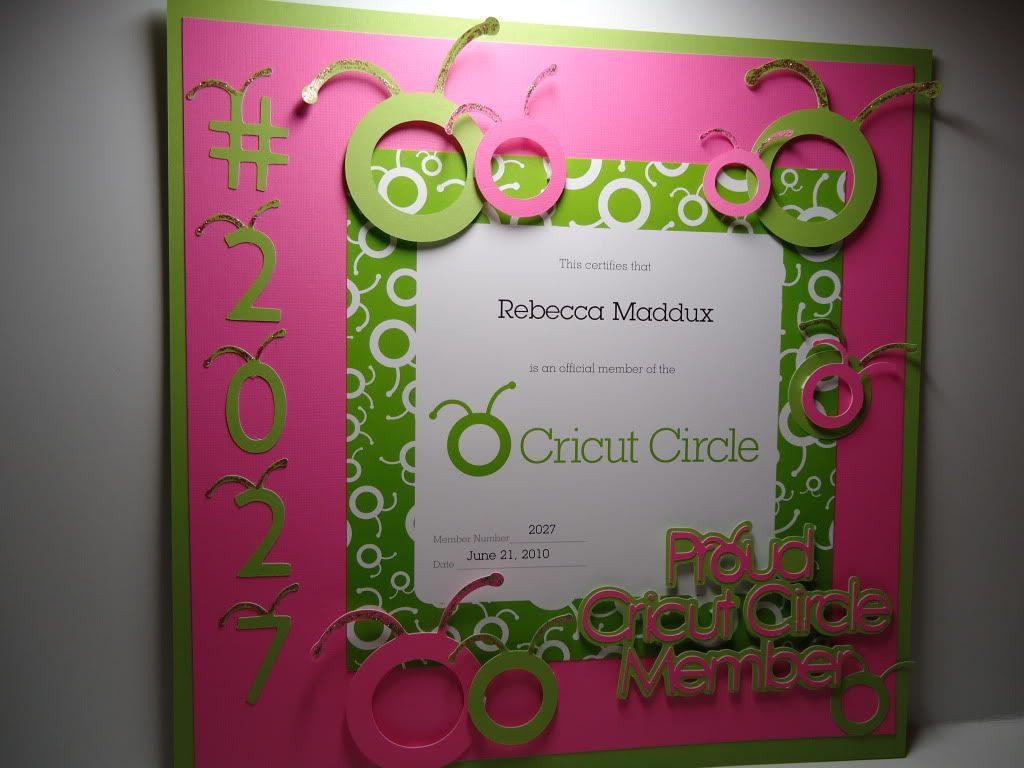
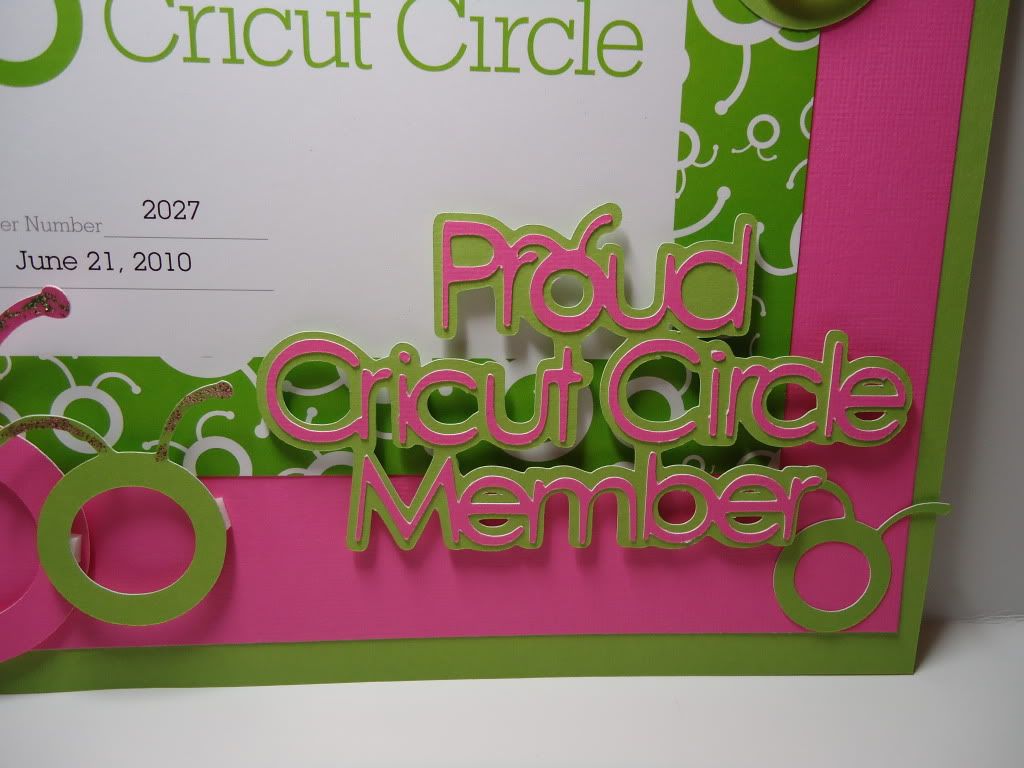
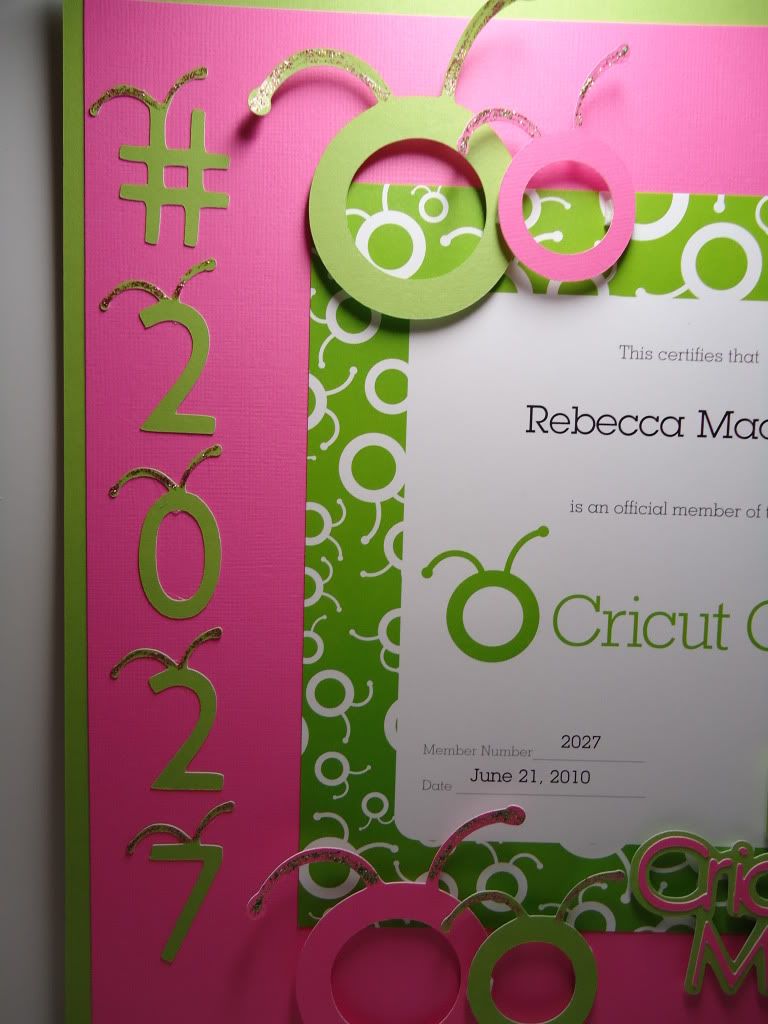
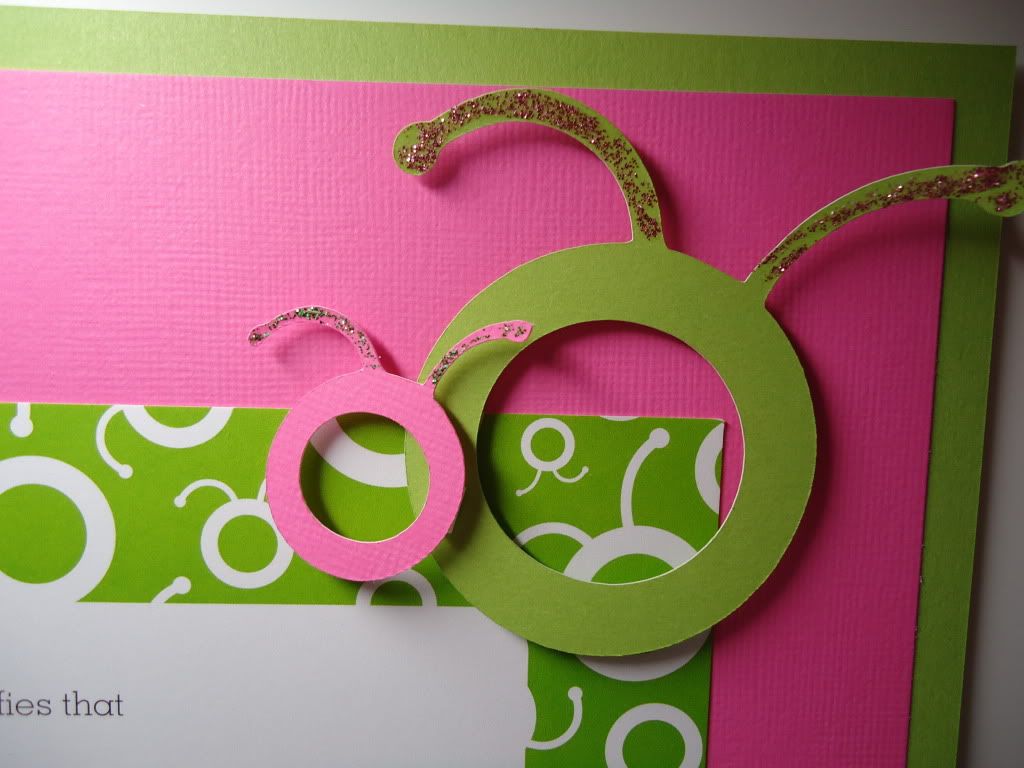 I used my circle member card and made this super cute 12 x 12 layout. I am going to frame it and hang it in my scrapbook room.
Numbers are cut at 2"
Words are cut at 2.75"
Circle heads are cut ar 2", 3.25" 2.5"
Numbers are cut at 2"
Words are cut at 2.75"
Circle heads are cut ar 2", 3.25" 2.5"
Friday, March 4, 2011
SSD DT Beach Theme Mini Album Layout
Hi Everyone
This week for the Sweet Sassy Diva challenge, Bobbi Jo asked us to make a Beach themed 8 3/4 x 5 3/4 mini album double layout.
Here is the layout I made:
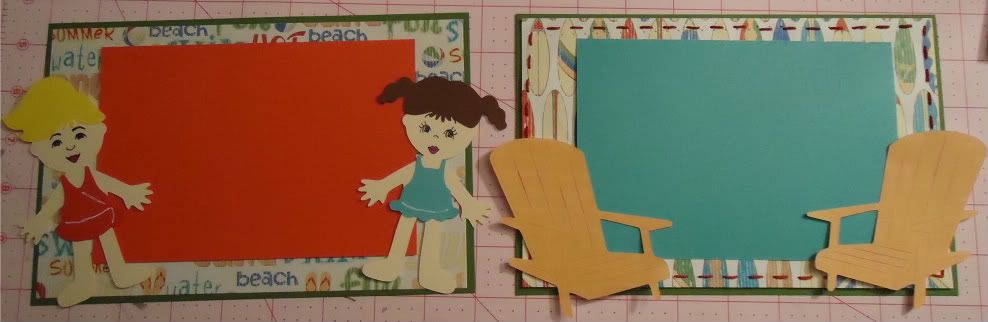
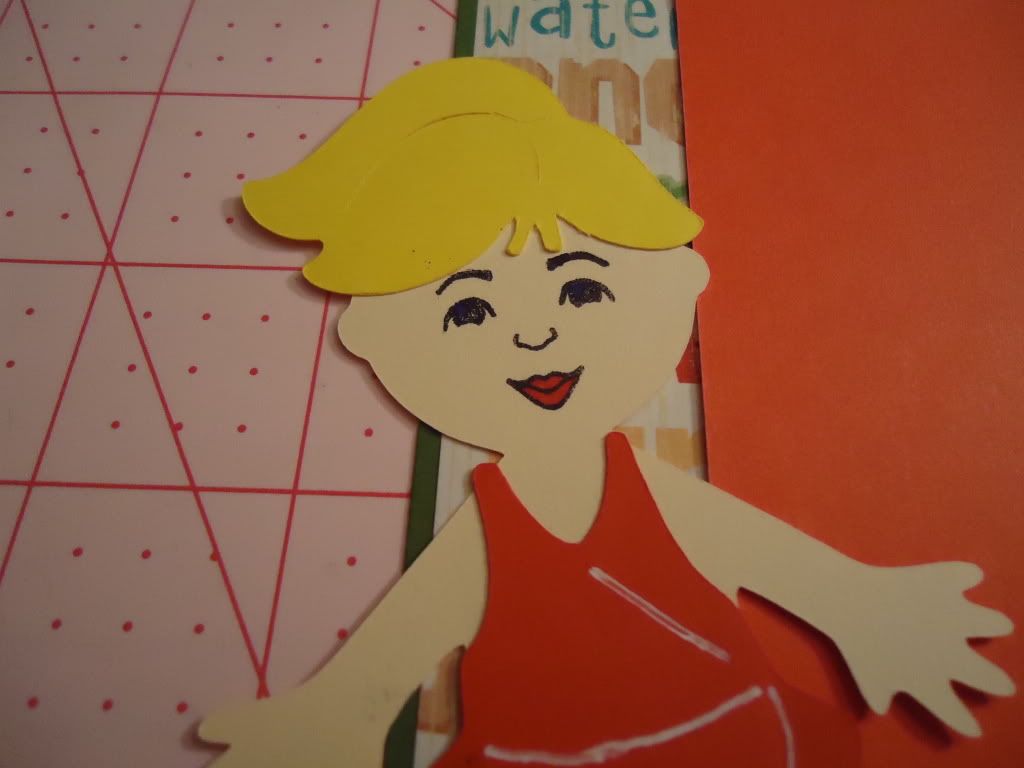
I used Peachy Keen PK165 Dolly Dumplins face stamps

The patterned paper on both pages is DCWV Stack 6 collection, cut at 5.5 x 8.5 each side. The solid green cardstock is cut at 5.75 x 8.75.
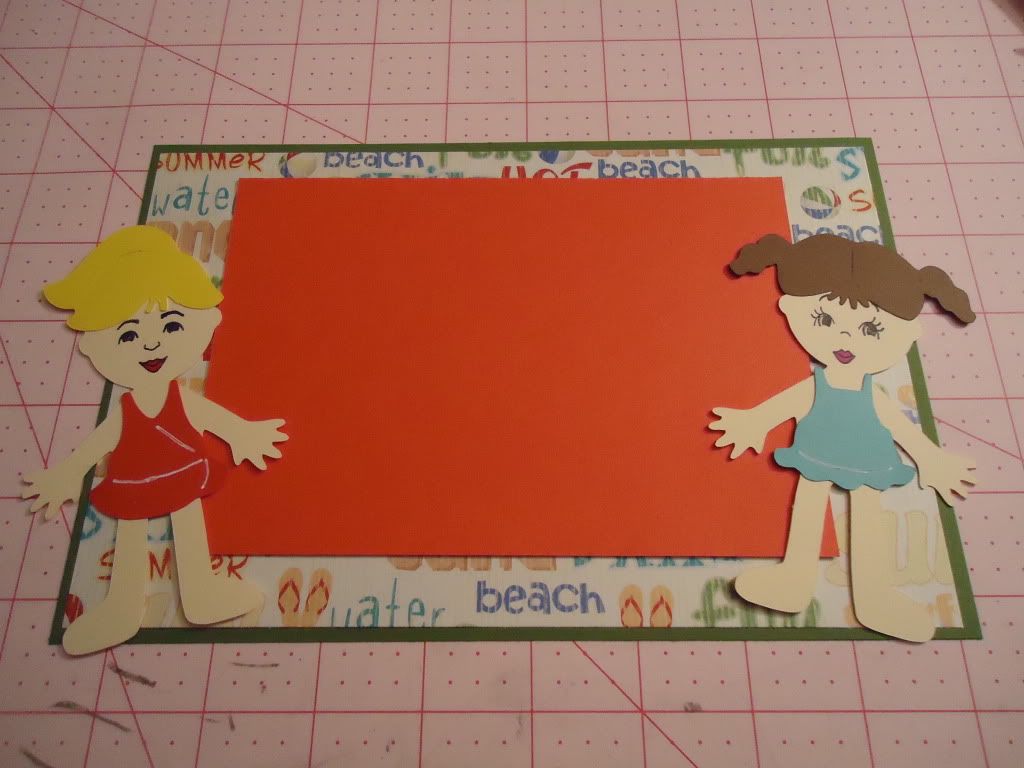
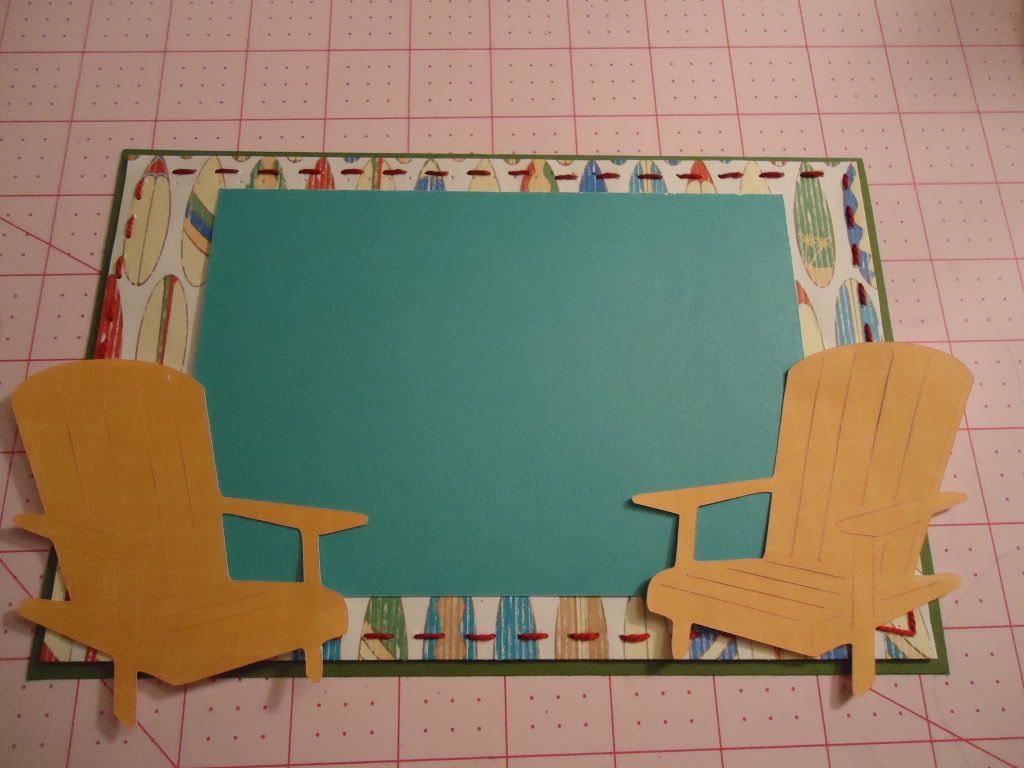
I used Everyday paperdolls for the dolls cut at 4" and Life's a Beach for the beach chairs cut at 3.5.
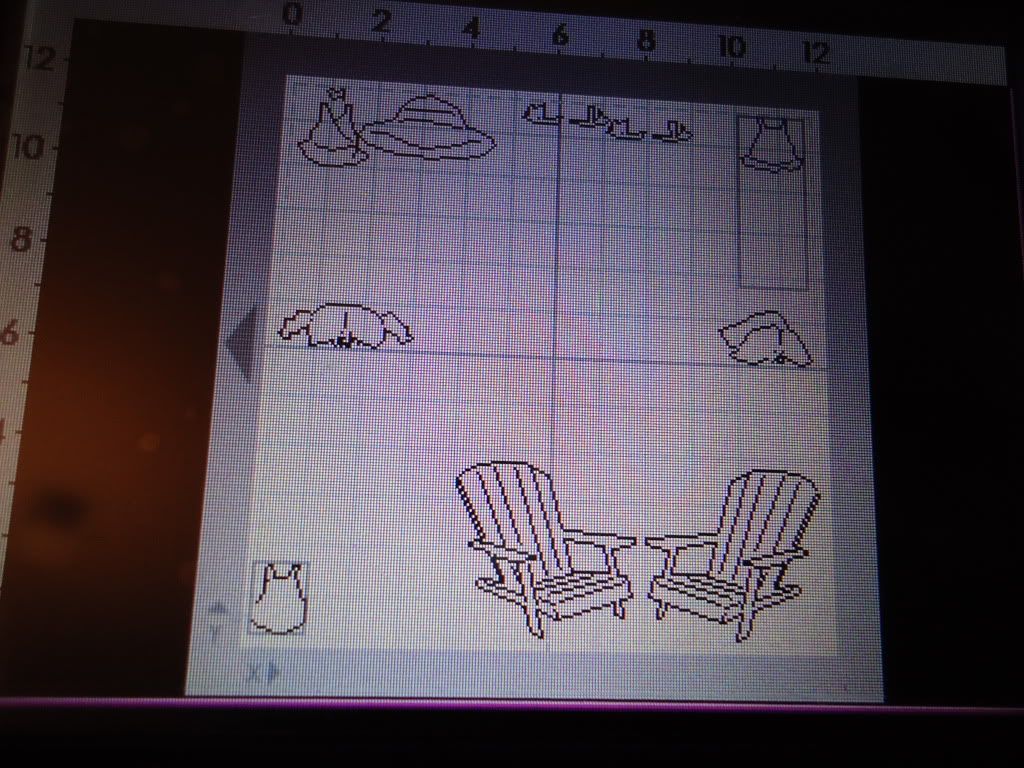
Here is how I set it up on the Gypsy
 And the paper set up on the mat
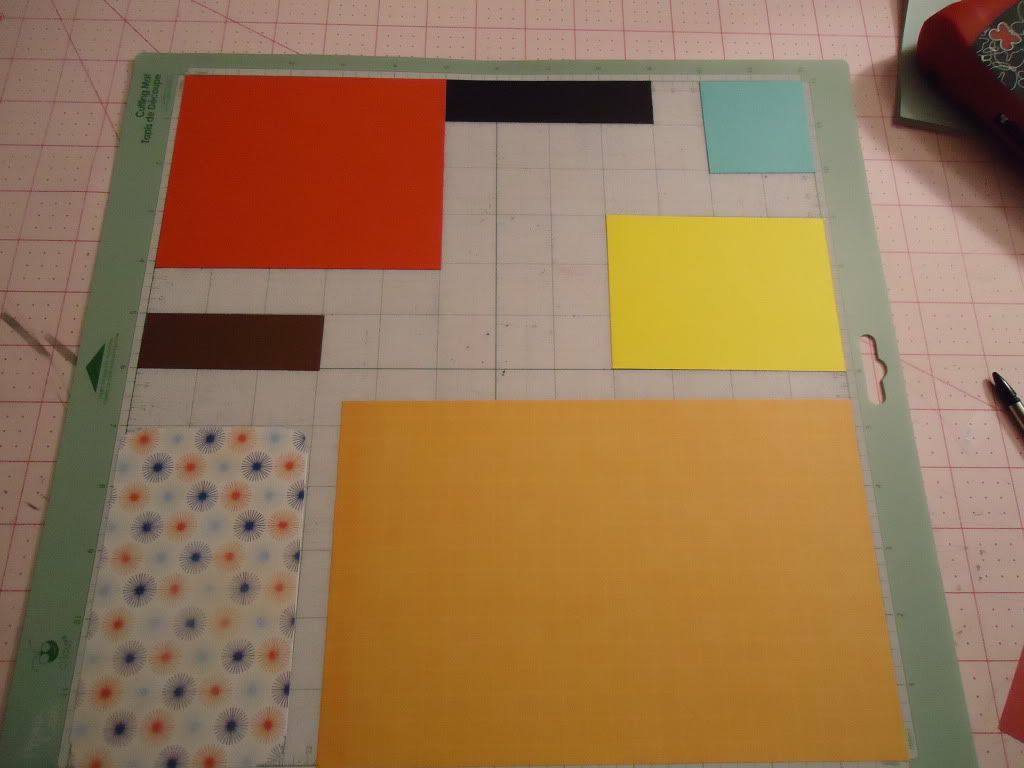 I ended up not using the black paper or the red,white & blue patterned paper.
I also used my new Seweasy to sew the border of the page, which I totally love. It was so easy to sew the paper after it punches the holes into it.
 Hope you all enjoy!
This week for the Sweet Sassy Diva challenge, Bobbi Jo asked us to make a Beach themed 8 3/4 x 5 3/4 mini album double layout.
Here is the layout I made:
I used Peachy Keen PK165 Dolly Dumplins face stamps
The patterned paper on both pages is DCWV Stack 6 collection, cut at 5.5 x 8.5 each side. The solid green cardstock is cut at 5.75 x 8.75.
I used Everyday paperdolls for the dolls cut at 4" and Life's a Beach for the beach chairs cut at 3.5.
Here is how I set it up on the Gypsy
I also used my new Seweasy to sew the border of the page, which I totally love. It was so easy to sew the paper after it punches the holes into it.
Subscribe to:
Posts (Atom)


 Crafting in The Hive